M62 nosedrive stud

 06-26-2007, 05:50 PM
#13
Junior Member
Posts like a Ricer Type-R

You MIGHT be able to do it through the accessory bracket, as it'* sleeved with a steel collar, but you'll know that answer when you get the heli-coil kit. My bet is you'll need a SC outlet gasket.
Here'* an example of what you want:
http://cgi.ebay.com/Helicoil-Thread-...QQcmdZViewItem
Or
http://cgi.ebay.com/M18-2-5-RECOIL-H...QQcmdZViewItem
The stock stud may be M8x1 or M8x1.25. I'm not sure. I THINK I went with M8x1, but I could do that because I replaced the stud and nut with a stainless M8x1 Hex-head cap screw.
06-26-2007, 06:08 PM
#14
Junior Member
Posts like a Ricer Type-R
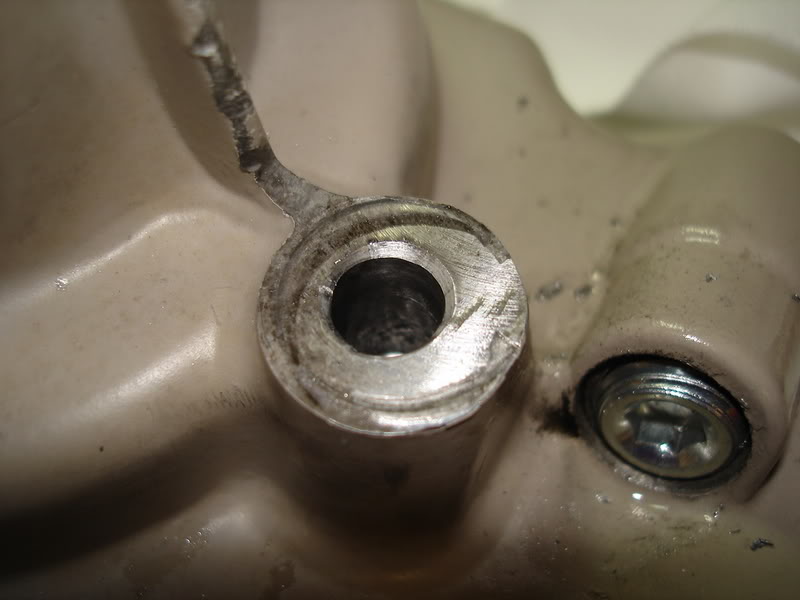
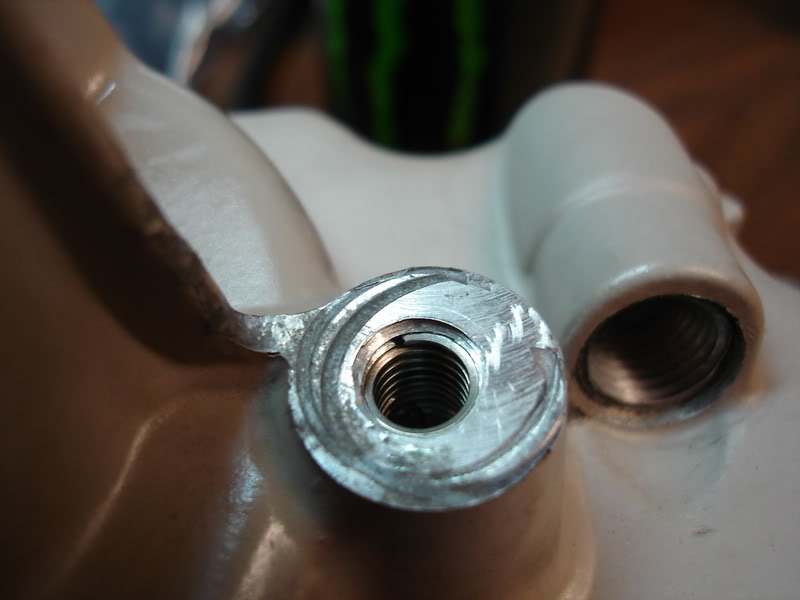
Stripped threads:
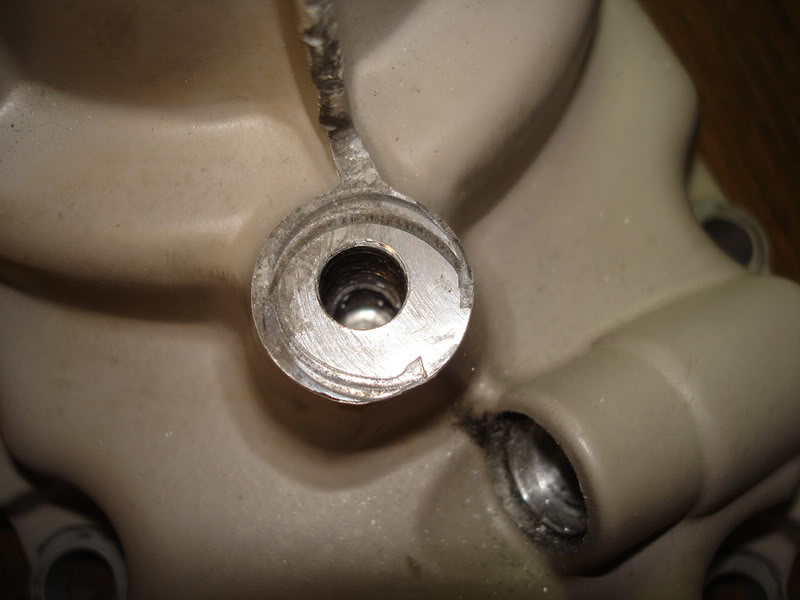
Drilled out with either the drill that comes in the kit, or the drill size the kit instructions specify (I also lightly chamfered the lip to make the tap start easier for the next step):
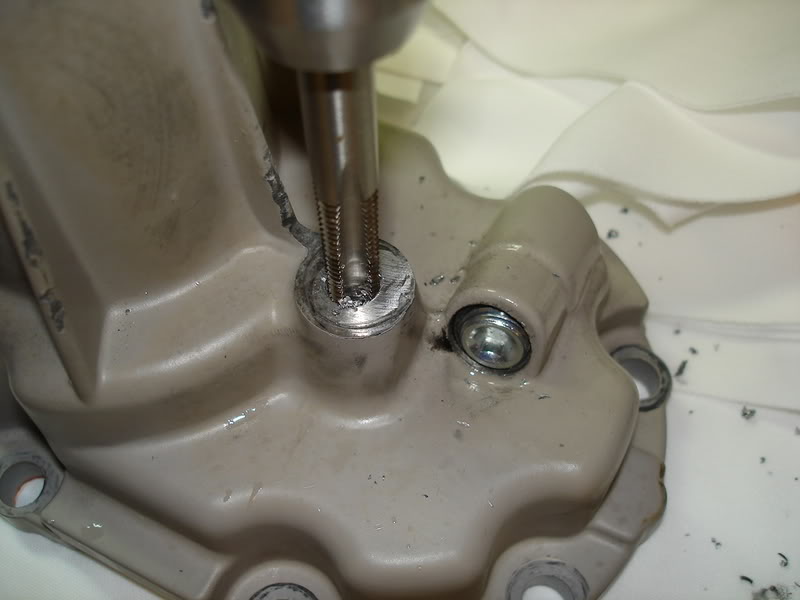
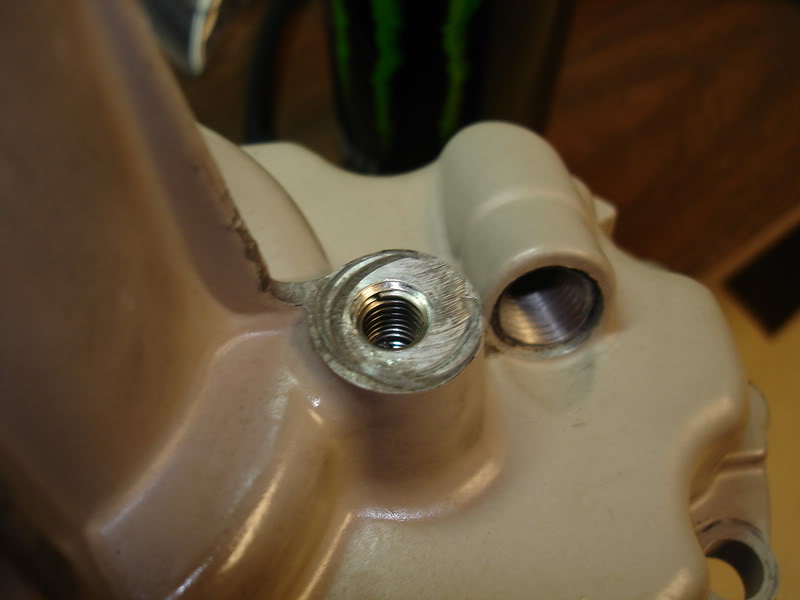
Tapping the new threads to match the insert (use oil, back out frequently to clean the slag, keep it STRAIGHT):
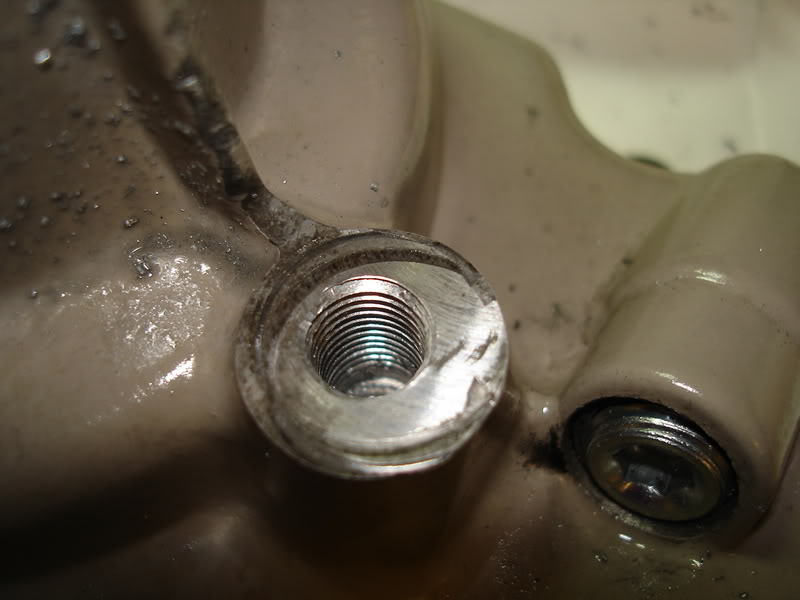
Finished tapping:
The new thread insert screws in just like a bolt, using the insertion tool (clean the oil from the tapping step out first) and apply a little red loctite to the OUTSIDE of the coil and the INSIDE of the tapped hole before insertion. This will help lock the insert in place:
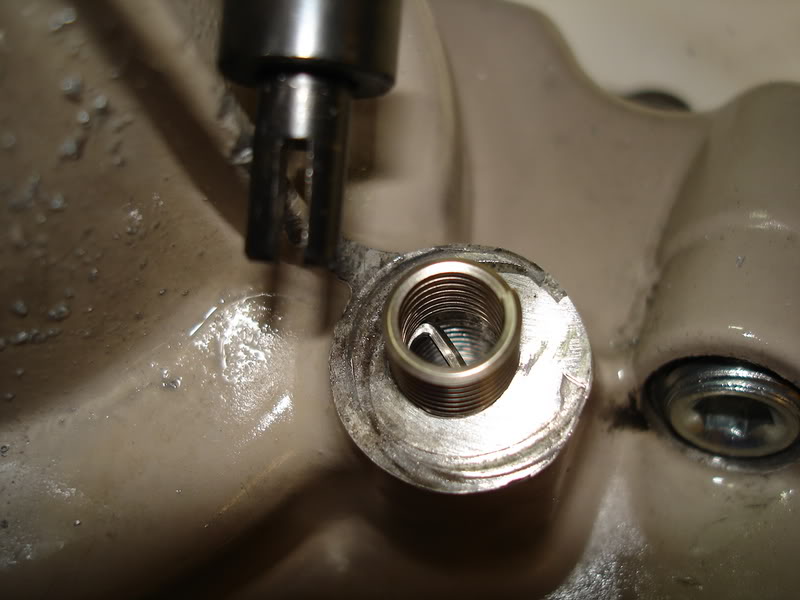
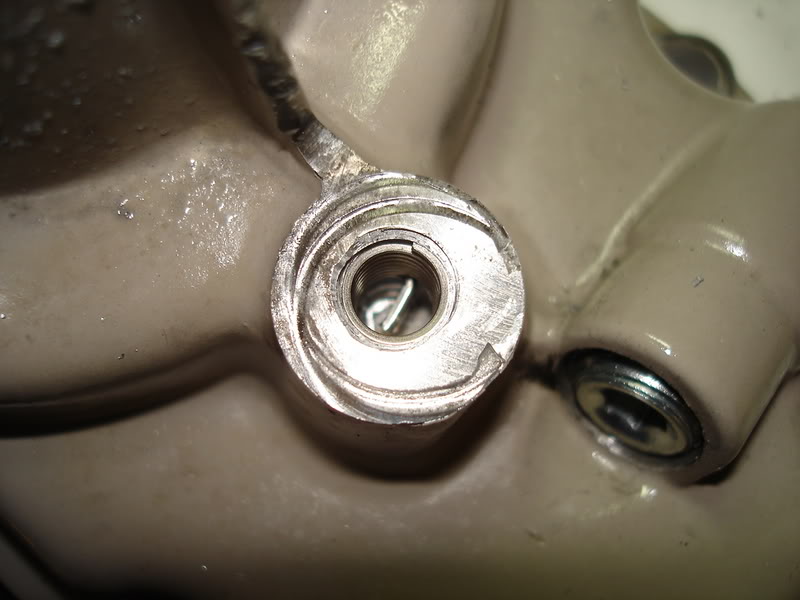
Insert fully seated. The tab sometimes breaks off naturally, but I usually have to get in there with small needle-nose pliers to break it off. It doesn't really matter. Your stud/bolt will just bend it out of the way:
Drilled out with either the drill that comes in the kit, or the drill size the kit instructions specify (I also lightly chamfered the lip to make the tap start easier for the next step):
Tapping the new threads to match the insert (use oil, back out frequently to clean the slag, keep it STRAIGHT):
Finished tapping:
The new thread insert screws in just like a bolt, using the insertion tool (clean the oil from the tapping step out first) and apply a little red loctite to the OUTSIDE of the coil and the INSIDE of the tapped hole before insertion. This will help lock the insert in place:
Insert fully seated. The tab sometimes breaks off naturally, but I usually have to get in there with small needle-nose pliers to break it off. It doesn't really matter. Your stud/bolt will just bend it out of the way:
06-27-2007, 09:20 AM
#15
Senior Member
Certified Car Nut
Thread Starter

Join Date: Oct 2002
Posts: 11,308
Likes: 0
Received 0 Likes
on
0 Posts

Thanks Bill. I would have checked this last night when I said I was about to, but the internet wasn't working.
Looks pretty easy. I wish I didn't have to remove the SC again, but it shouldn't be that much of a pain. Did you say you can buy these inserts separately, whatever size you need?
Looks pretty easy. I wish I didn't have to remove the SC again, but it shouldn't be that much of a pain. Did you say you can buy these inserts separately, whatever size you need?

Thread
Thread Starter
Forum
Replies
Last Post