(Pic heavy)SLP GTX wheel resto documentation
 11-01-2010, 12:56 AM
#21
Senior Member
True Car Nut
Join Date: Mar 2009
Location: Fort crack homie
Posts: 2,894
Likes: 0
Received 0 Likes
on
0 Posts

 11-01-2010, 05:01 PM
#22
Senior Member
Posts like a Turbo
Thread Starter
Join Date: May 2010
Location: Illinois
Posts: 233
Likes: 0
Received 0 Likes
on
0 Posts
I'm just not too wild about duplicolor wheel paints. I have used them in the past to paint some rollbars and such for my cousin'* Toyota and I had alot of problems with the way the cans sprayed. Even tried warming them in hot water for more pressure, they may have just sat too long at the autoparts store we bought them from. I think I ended up using spray bedliner, which turned out great.
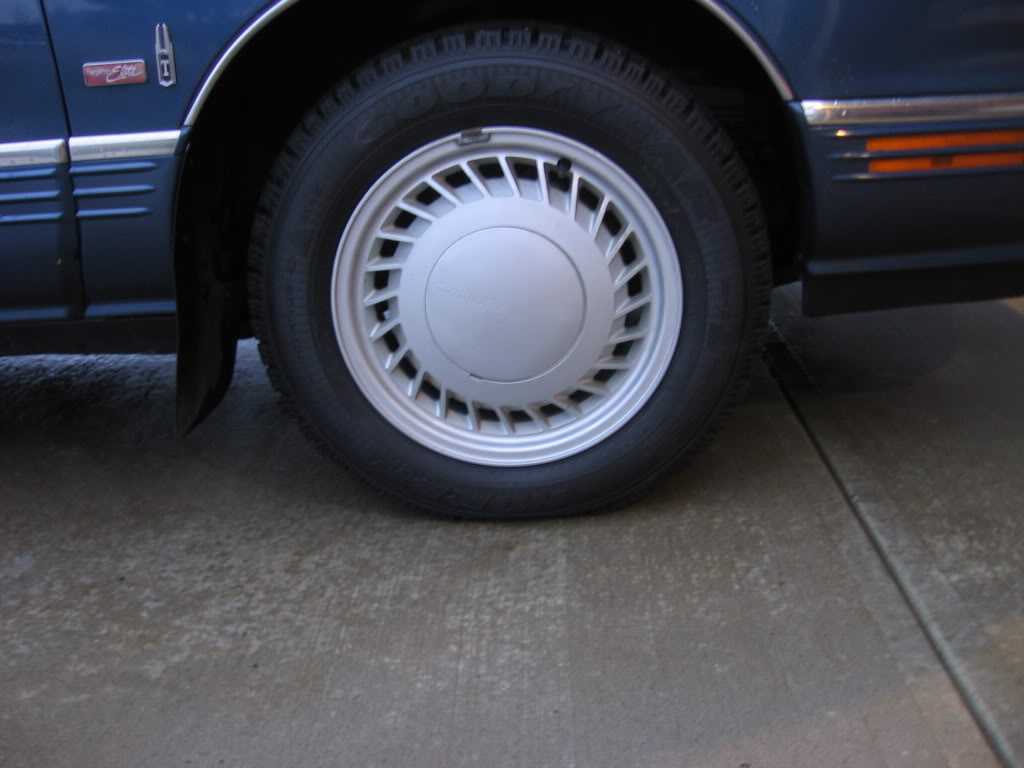
But heres the progress pics so far. This was after using a 80 grit flapper wheel on a dremel to remove the pitting in between the spokes and where the spokes meet the wheel.


and I got my garage door up this weekend! Now I'll have to worry about eliminating the rodent population...and actually picking up cigarette butts.
 11-01-2010, 05:10 PM
#23
Senior Member
True Car Nut
Join Date: Jun 2007
Location: New Lenox, IL
Posts: 2,478
Likes: 0
Received 0 Likes
on
0 Posts
I have actually seen that, thank you for posting though. Good vid. I wish sandblasting and fill prime would have fixed my problems, lucky!
I'm just not too wild about duplicolor wheel paints. I have used them in the past to paint some rollbars and such for my cousin'* Toyota and I had alot of problems with the way the cans sprayed. Even tried warming them in hot water for more pressure, they may have just sat too long at the autoparts store we bought them from. I think I ended up using spray bedliner, which turned out great.
But heres the progress pics so far. This was after using a 80 grit flapper wheel on a dremel to remove the pitting in between the spokes and where the spokes meet the wheel.
and I got my garage door up this weekend! Now I'll have to worry about eliminating the rodent population...and actually picking up cigarette butts.
Want to get rid of rodents? Get a cat or two.
11-02-2010, 02:59 AM
#24
Senior Member
Posts like a Turbo
Thread Starter
Join Date: May 2010
Location: Illinois
Posts: 233
Likes: 0
Received 0 Likes
on
0 Posts
11-05-2010, 07:08 PM
#25
Senior Member
Posts like a Turbo
Thread Starter
Join Date: May 2010
Location: Illinois
Posts: 233
Likes: 0
Received 0 Likes
on
0 Posts
Just received my wheel polishing kit from Eastwood today. Hopefully it will get me further along than sanding. I'll have to see. Should have more progress photos over the weekend.
11-07-2010, 01:52 PM
#26
Senior Member
Posts like a Turbo
Thread Starter
Join Date: May 2010
Location: Illinois
Posts: 233
Likes: 0
Received 0 Likes
on
0 Posts
heres a picture of the kit I already ordered from Eastwood for reference, just their wheel polishing kit,

Comes with grease-less compounds in 80, 220 and 320 grits. Supposed to be easier than trying to sand everything with sandpaper. Ive been having alot of problems getting in between the spokes with the supplied cone shaped buff wheels.
It also comes with tripoli compound and jewelers white(?). These compounds came in very handy after wet sanding the face of the spokes. I applied the steps with the grease-less compounds but found that some sanding with a D/A and wet sanding made the spokes look much better.

I just ordered this buff wheel kit today, it'* still less expensive than buying the pads at a store even though it comes with compounds I don't need.

Sorry for the lack of hi res photos and step by steps. A couple of the spokes on that wheel need to be re-sanded (the pitting I missed really stands out now, lesson learned.)
Hopefully after I figure out a process that works best I'll write a how-to of some sort.
Comes with grease-less compounds in 80, 220 and 320 grits. Supposed to be easier than trying to sand everything with sandpaper. Ive been having alot of problems getting in between the spokes with the supplied cone shaped buff wheels.
It also comes with tripoli compound and jewelers white(?). These compounds came in very handy after wet sanding the face of the spokes. I applied the steps with the grease-less compounds but found that some sanding with a D/A and wet sanding made the spokes look much better.
I just ordered this buff wheel kit today, it'* still less expensive than buying the pads at a store even though it comes with compounds I don't need.
Sorry for the lack of hi res photos and step by steps. A couple of the spokes on that wheel need to be re-sanded (the pitting I missed really stands out now, lesson learned.)
Hopefully after I figure out a process that works best I'll write a how-to of some sort.
11-07-2010, 06:05 PM
#27
Administratus Emeritus

Certified Car Nut
WOW!. What a difference this wheel has gone from since you began with them. Awesome work Man, you are certainly dedicated to getting some tired OEM'* back to snuff. 
11-27-2010, 05:05 PM
#30
Junior Member
Posts like a V-Tak
Join Date: Jun 2010
Location: Edmonton, AB
Posts: 29
Likes: 0
Received 0 Likes
on
0 Posts
So how did these turn out?
I bought a set of alloys for my 98 winter tires. Took them to the shop and sandblasted them myself to get rid of all the peeling junk on the suface. They turned out pretty good. Then I bought some Argent wheel paint and painted them, installed the ice radials and put them on the car. This is how they turned out.
I bought a set of alloys for my 98 winter tires. Took them to the shop and sandblasted them myself to get rid of all the peeling junk on the suface. They turned out pretty good. Then I bought some Argent wheel paint and painted them, installed the ice radials and put them on the car. This is how they turned out.