The retrofit begins!
 02-12-2010, 11:04 PM
#1
Senior Member
Posts like a Turbo
Thread Starter
Join Date: Feb 2007
Location: Alabama
Posts: 494
Likes: 0
Received 0 Likes
on
0 Posts

On my Buick LeSabre. I've been wanting to do this for a while, and I finally got started on it the other day.
Here'* the details and progress thus far. I hope that by posting this as my first attempt (hopefully successful) at a retrofit will help someone with theirs in the future!
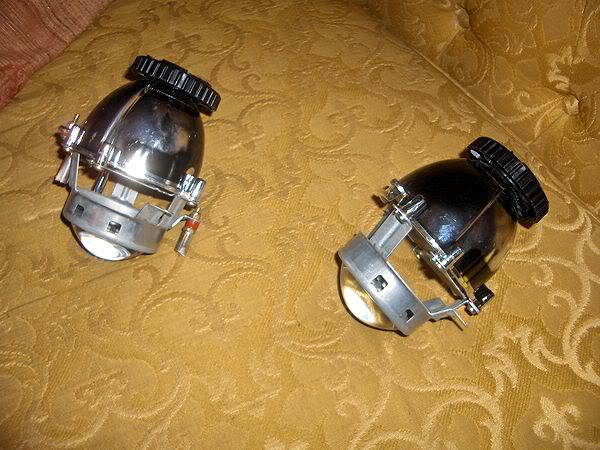
I chose Audi A6 D2S single xenon Hella units. The price was right and the output is good enough for me.
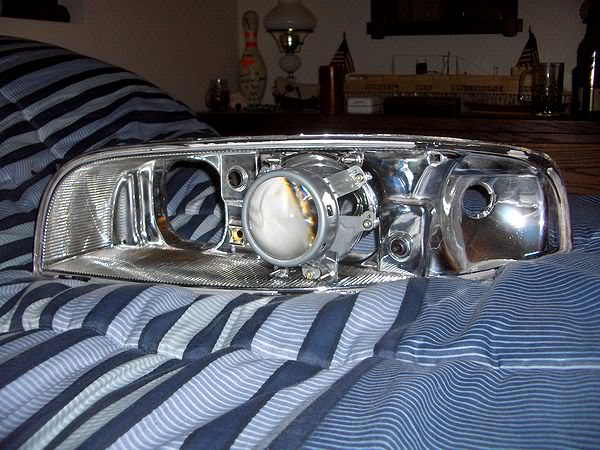
So yesterday I cracked open my headlights, after a couple of days of thinking and planning and whatnot. Most of my plans were useless though, as my headlights were completely different than expected!
Here'* what I know for sure.
I will have two identical appearing projectors in each headlight, one for the high beam and one for the low beam. The high beam will be a halogen Audi A6 H1 unit, the lens looks identical to the HID version, but the bowls are different. With the same shroud on each, they will look the same.
They will be mounted directly to the housing on the top and bottom for both. I have nothing to mount them to at the rear!
I will be using my aftermarket Xentec ballasts with adapter cables to D2S from DDM...I have had no trouble with these ballasts...they've been absolutely perfect, so why fix what'* not broken!
However, I will be using OE quality bulbs...most agree (even on HIDPlanet!) that a ballast is a ballast, if you have a good kit one there is no need to replace it...but bulbs are a different story! No cheap kit bulbs for this one, I want years of good output...
I guess that'* it. I'm trying to do this retrofit on a budget, and I've done nearly all the buying I need to I HOPE! All I need left is shrouds...and maybe some clear lenses if I decide I want to do that.
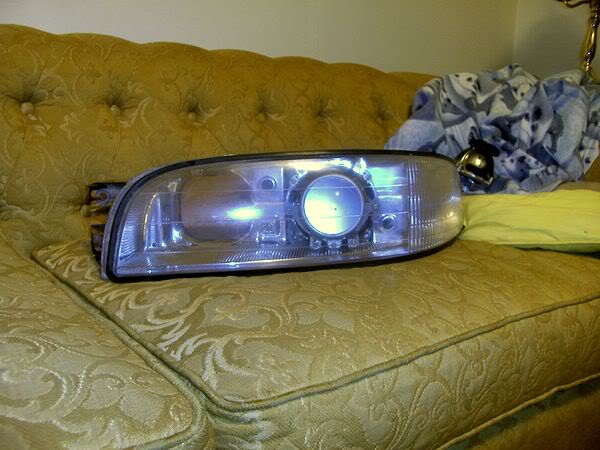
Here'* the progress I've made so far. I'm going to work one headlight at a time.
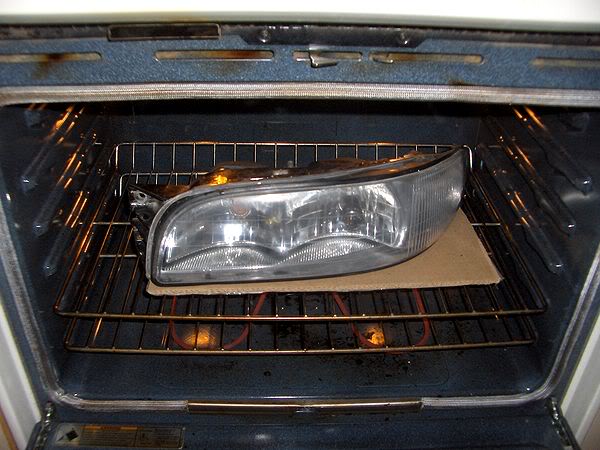
Smells yummy :3
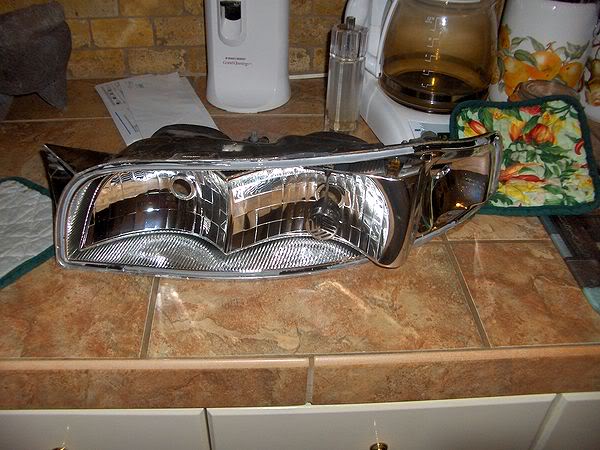
Cover off.

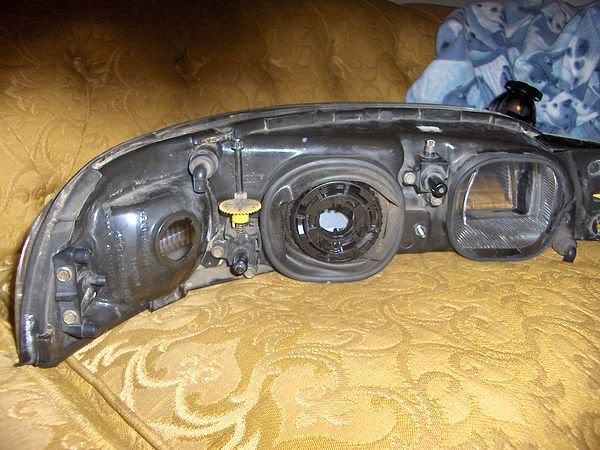
Headlight disassembled.
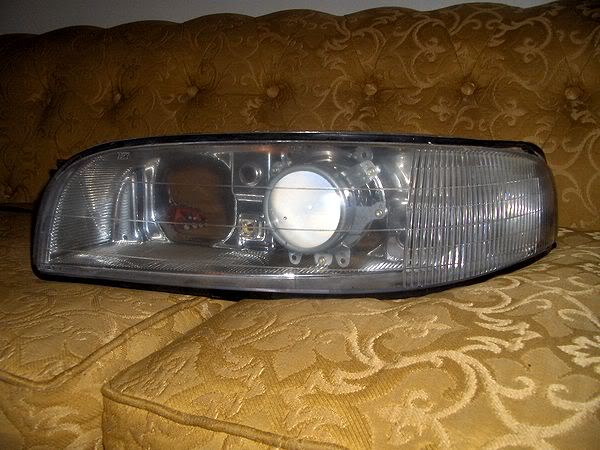
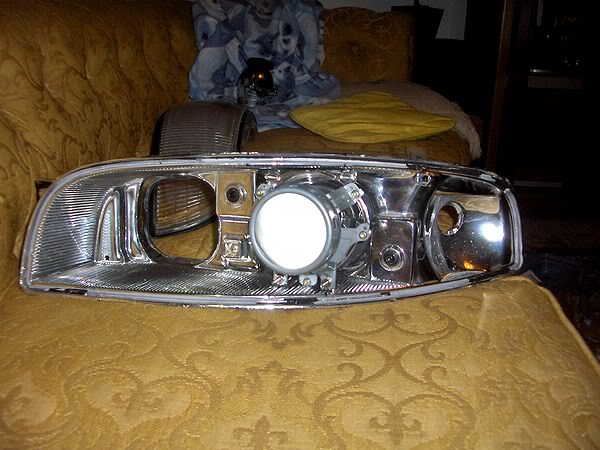
Test fit from last night. Imagine two of those side by side, that'* about how it will look.
Today'* progress!
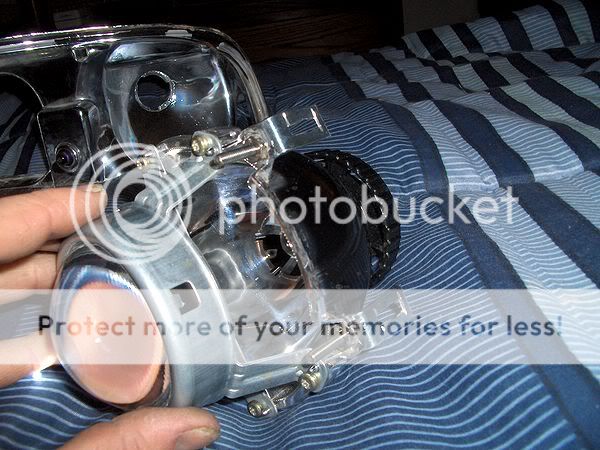
I bought those halogen Audi A6'* I mentioned earlier. Also shaved down my projector from the above pic to make it fit better...it'* REALLY tight in there.
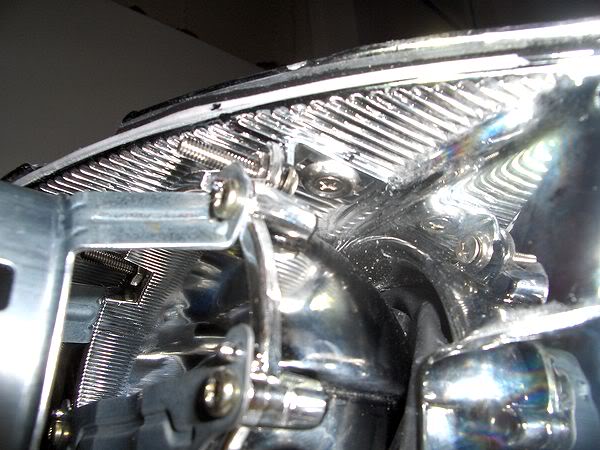
I made a prototype mounting strategy for one of the A6'*.
In place. Not bolted down, just resting in there. It'* REALLY tight, but I have enough range of motion that I feel I can aim it adequately.
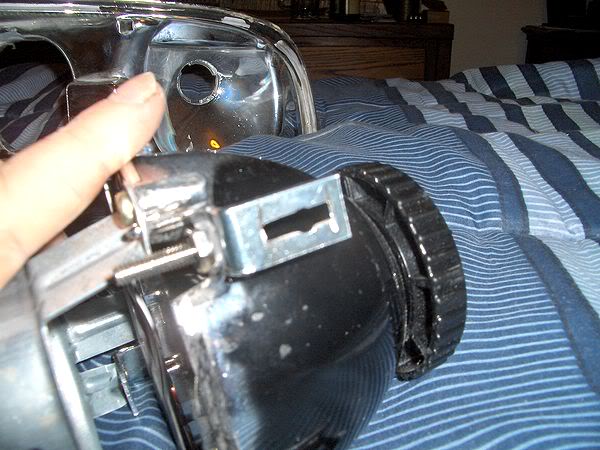
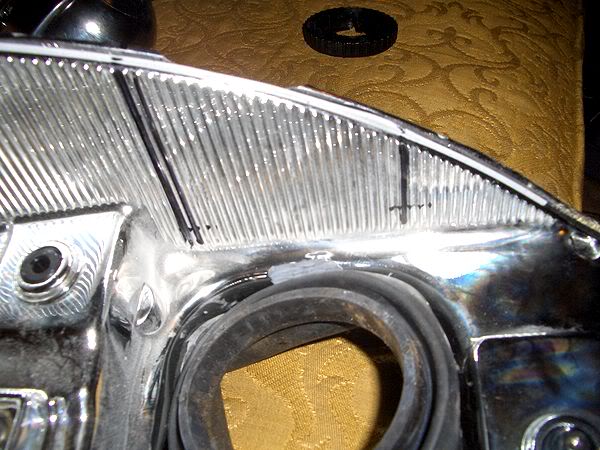
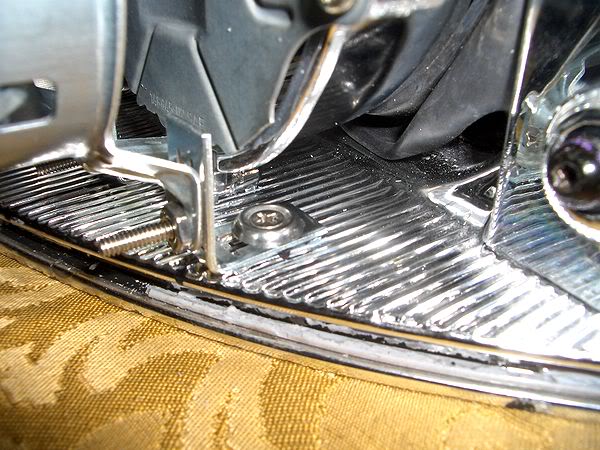
My slider mounts on the top. These will allow me to move it up and down.
Closeup.
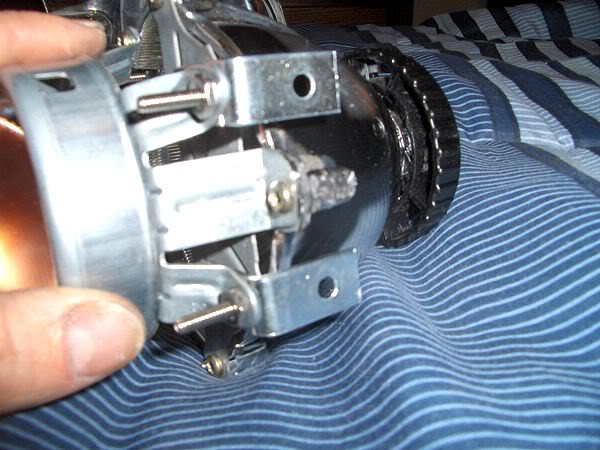
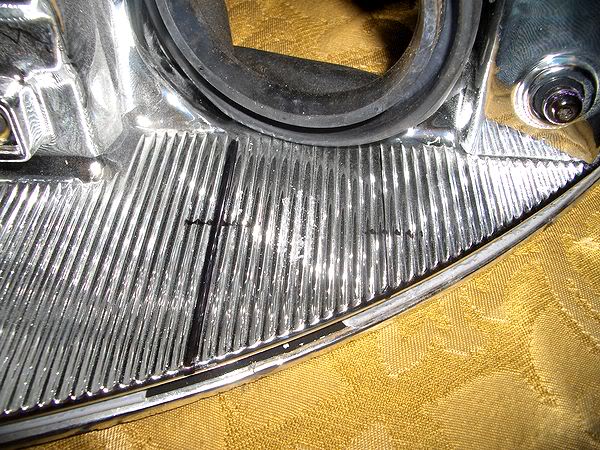
Bottom mounts. I need to notch these out and make them slider mounts too so I can have left and right motion.
I don't think I'll be able to make much further progress until my bulbs and adapters get here...bulbs are due on the 16th, but I haven't heard a word from DDM about the adapters. Hopefully they are on their way. Ordered on the 10th.
.
.
.
Here'* the details and progress thus far. I hope that by posting this as my first attempt (hopefully successful) at a retrofit will help someone with theirs in the future!
I chose Audi A6 D2S single xenon Hella units. The price was right and the output is good enough for me.
So yesterday I cracked open my headlights, after a couple of days of thinking and planning and whatnot. Most of my plans were useless though, as my headlights were completely different than expected!
Here'* what I know for sure.
I will have two identical appearing projectors in each headlight, one for the high beam and one for the low beam. The high beam will be a halogen Audi A6 H1 unit, the lens looks identical to the HID version, but the bowls are different. With the same shroud on each, they will look the same.
They will be mounted directly to the housing on the top and bottom for both. I have nothing to mount them to at the rear!
I will be using my aftermarket Xentec ballasts with adapter cables to D2S from DDM...I have had no trouble with these ballasts...they've been absolutely perfect, so why fix what'* not broken!
However, I will be using OE quality bulbs...most agree (even on HIDPlanet!) that a ballast is a ballast, if you have a good kit one there is no need to replace it...but bulbs are a different story! No cheap kit bulbs for this one, I want years of good output...
I guess that'* it. I'm trying to do this retrofit on a budget, and I've done nearly all the buying I need to I HOPE! All I need left is shrouds...and maybe some clear lenses if I decide I want to do that.
Here'* the progress I've made so far. I'm going to work one headlight at a time.
Smells yummy :3
Cover off.
Headlight disassembled.
Test fit from last night. Imagine two of those side by side, that'* about how it will look.
Today'* progress!
I bought those halogen Audi A6'* I mentioned earlier. Also shaved down my projector from the above pic to make it fit better...it'* REALLY tight in there.
I made a prototype mounting strategy for one of the A6'*.
In place. Not bolted down, just resting in there. It'* REALLY tight, but I have enough range of motion that I feel I can aim it adequately.
My slider mounts on the top. These will allow me to move it up and down.
Closeup.
Bottom mounts. I need to notch these out and make them slider mounts too so I can have left and right motion.
I don't think I'll be able to make much further progress until my bulbs and adapters get here...bulbs are due on the 16th, but I haven't heard a word from DDM about the adapters. Hopefully they are on their way. Ordered on the 10th.
.
.
.


 02-13-2010, 12:21 PM
#3
Senior Member
Posts like a Turbo
Thread Starter
Join Date: Feb 2007
Location: Alabama
Posts: 494
Likes: 0
Received 0 Likes
on
0 Posts
Thanks, I can't wait either lol. I'm hoping to wrap this up in two weeks, but I think it could be longer than that. I still have no idea what I'm going to do for shrouds considering how tight it is in there, and only a vague idea of how I'm going to seal up the back of the headlight.
.
.
.
.
.
.
02-13-2010, 01:11 PM
#5
-- SITE DONATOR --

True Car Nut
02-13-2010, 09:07 PM
#6
Senior Member
Posts like a Turbo
Thread Starter
Join Date: Feb 2007
Location: Alabama
Posts: 494
Likes: 0
Received 0 Likes
on
0 Posts
Thanks guys! I wish I had more real progress for you, but at this point it seems all I can do is sit around and wait...I really hate it!
I did finish putting notches in the two bottom mounts that I mentioned yesterday, and I figured out a way to seal the back of the headlight using the stock rubber gasket that was on there originally.
So yeah...nothing much to share other than another test fit and my modified gasket...
I'm hoping that will seal it off well enough. Now that the sealing problem is solved, only pressing problem I'm facing is what shrouds can I use that will effectively cover the hardware but still fit in here. Not an easy set of criteria.
This waiting sucks! If I had all my stuff here...and some better cutting attachments for my Dremel...I could have this project done by the end of the day tomorrow.
Still need:
D2S bulbs (on the way)
D2S adapters (don't know...really wish DDM would hurry up!)
Halogen A6 high beams (on the way)
Shrouds (don't know what I'm going to use yet)
H1 bulbs (haven't bought yet)
Harnesses to convert 9005 to H1 and a relay possibly (haven't bought yet)
But yeah, progress is gonna be slow for a while...I don't want to drill the mounting holes into my headlight yet even though I'm positive it'* just about perfect, I want to install the lights in first to check and make absolutely sure that I have it jammed in there right about where it needs to be.
.
.
.
02-13-2010, 11:57 PM
#7
Senior Member
True Car Nut
That looks nice. I always wondered how the projectors are mounted. Your write up clarifies it for me.
I look forward to seeing both projectors next to each other
I look forward to seeing both projectors next to each other
02-14-2010, 01:10 AM
#8
Senior Member
Posts like a Turbo
Thread Starter
Join Date: Feb 2007
Location: Alabama
Posts: 494
Likes: 0
Received 0 Likes
on
0 Posts
Glad to help! This is definitely not the easiest way to mount them, but I have nothing to mount to at the rear so I have to use the top and bottom.
I hate to keep wasting your time with all these tiny updates lol, but I am making progress. I overcame a few more hurdles today.
Decided to go ahead and mount up my sliders...I checked and rechecked, and I have everything lined up just about perfectly, there'* very little else I could do without the bulbs & adapters. So I went ahead and drilled and mounted.
Mounted...
Unfortunately I was only able to use two out of the four mounting points due to space issues...but as I said earlier it is TIGHT in there. It barely moves on it'* own without anything bolted down, with these in place I think the projector bowl would break before it would move. The entire assembly can be picked up by the projector and not move. Sounds sturdy enough?
I'll fill in the extra holes with RTV.
However with the bolts loosened it can be adjusted for horizontal and vertical alignment. Every measurement I've taken seems to indicate that I'm spot on with rotational, but we'll have to see.
Final test fit of the night, mounted.
I think I'm going to start work on the other side. I won't go into as much detail with it though, it will be the same as this one...
I can see the end, lol. I think I can pull this off very successfully. Only major hurdle I foresee is what I'm going to do about shrouds.
.
.
.
Last edited by LeSabreUltra; 02-14-2010 at 01:44 AM.
02-14-2010, 07:01 PM
#10
Senior Member
Posts like a Turbo
Thread Starter
Join Date: Feb 2007
Location: Alabama
Posts: 494
Likes: 0
Received 0 Likes
on
0 Posts
Well in that case, here'* another micro update lol...
I found some shrouds that will work and should look really nice. The dimensions fit closely to my housing. They are E-46R shrouds, like this:
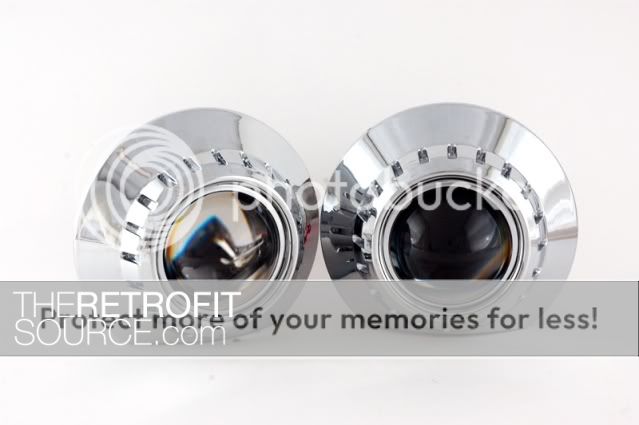
I will have to shave a little off the bottom to make them fit, so in the end, both sides will be flat-ish.
But in the end it will look sorta like this, except silver and a little narrower from top to bottom:

(and not on a BMW obviously)
Other than that not much...just checked rotation again and scraped away old sealant from around the headlight, I'm not going to reuse 13 year old sealant.
I promise this is going to take off a lot faster sooner or later lol, whenever my stuff gets here. Right now I know how I'm going to do everything from here out, so I hope to have this done in less than two weeks! Friday the 26th I'm driving down to Mobile to pick up my uncle and it would be nice to take this car on the dark interstates. Plus it'* a lot quieter than my truck.
.
.
.
I found some shrouds that will work and should look really nice. The dimensions fit closely to my housing. They are E-46R shrouds, like this:
I will have to shave a little off the bottom to make them fit, so in the end, both sides will be flat-ish.
But in the end it will look sorta like this, except silver and a little narrower from top to bottom:
(and not on a BMW obviously)
Other than that not much...just checked rotation again and scraped away old sealant from around the headlight, I'm not going to reuse 13 year old sealant.
I promise this is going to take off a lot faster sooner or later lol, whenever my stuff gets here. Right now I know how I'm going to do everything from here out, so I hope to have this done in less than two weeks! Friday the 26th I'm driving down to Mobile to pick up my uncle and it would be nice to take this car on the dark interstates. Plus it'* a lot quieter than my truck.
.
.
.
Last edited by LeSabreUltra; 02-14-2010 at 07:04 PM.

