They said it couldnt' be done!
 09-28-2006, 10:00 PM
#1
Junior Member
Thread Starter

Join Date: Aug 2002
Posts: 0
Likes: 0
Received 0 Likes
on
0 Posts

Well, I was stubborn as usual and thought that I would be able to install a double-din Headunit in my car. The dash dimensions on my Aurora and the 2000+ Bonneville are the same, other than my dash opening is 7.25" at the top, and 6.75" wide at the bottom. I was told by various companies and other people that it wouldn't fit. I didn't listen, and this is what it got me.


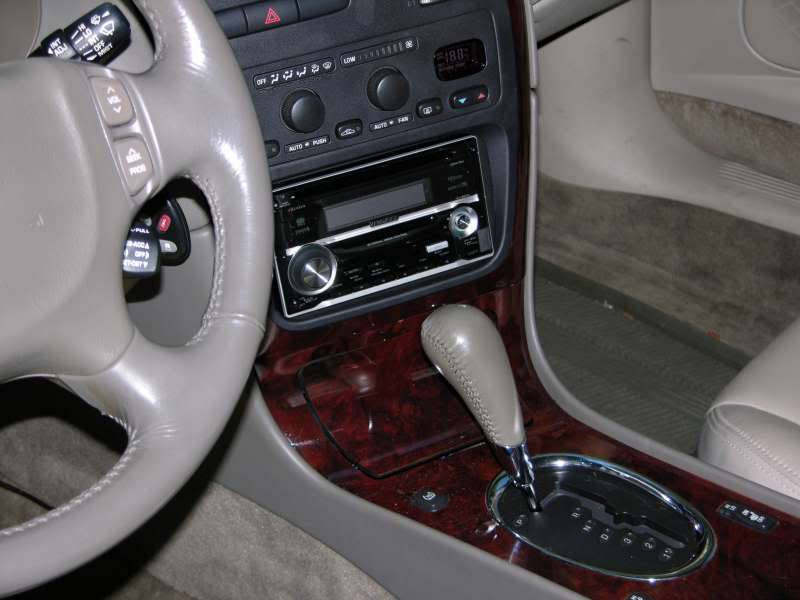
It fit perfectly through the dash opening!!!
The only insallation issue I had (which was pretty major) was that the dash was not DEEP enough. Toastedoats (Aaron) warned me of this, and he was absolutely right!
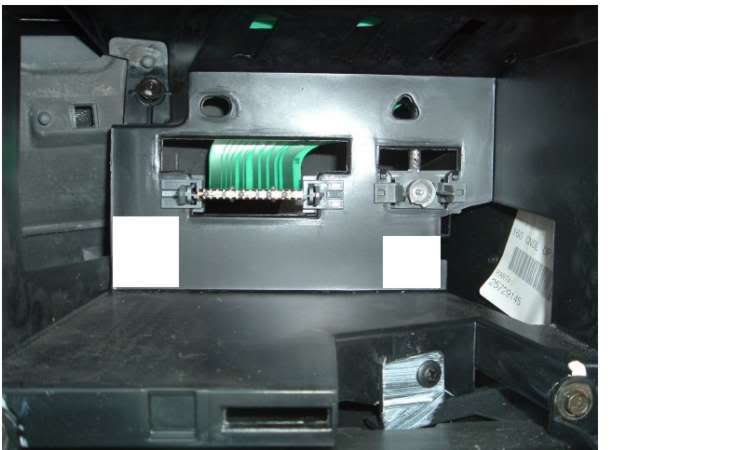
The spots that I cut out of my dash cavity can be seen in the picture below. I didn't get an actual picture of what I did, but the whtie boxes below represent the areas I had to cut out for the wire harness (right) and the RCA cables (left) to fit through.
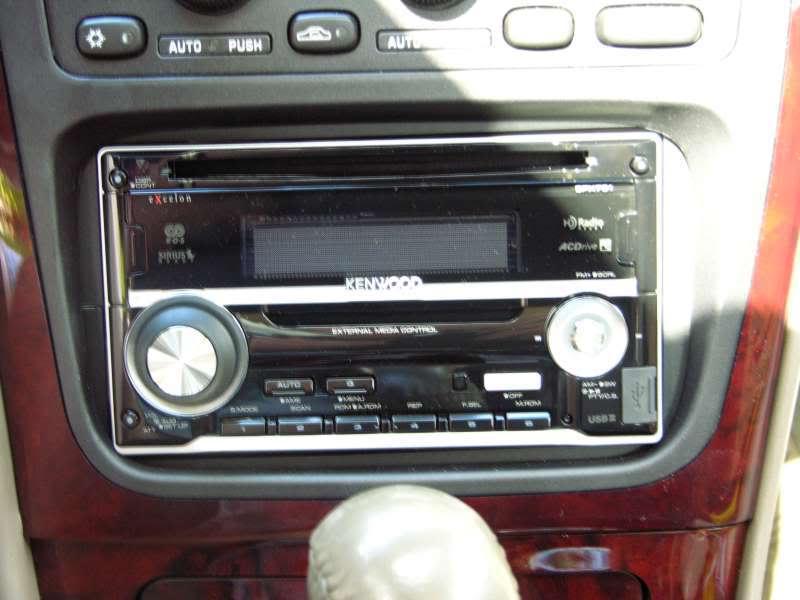
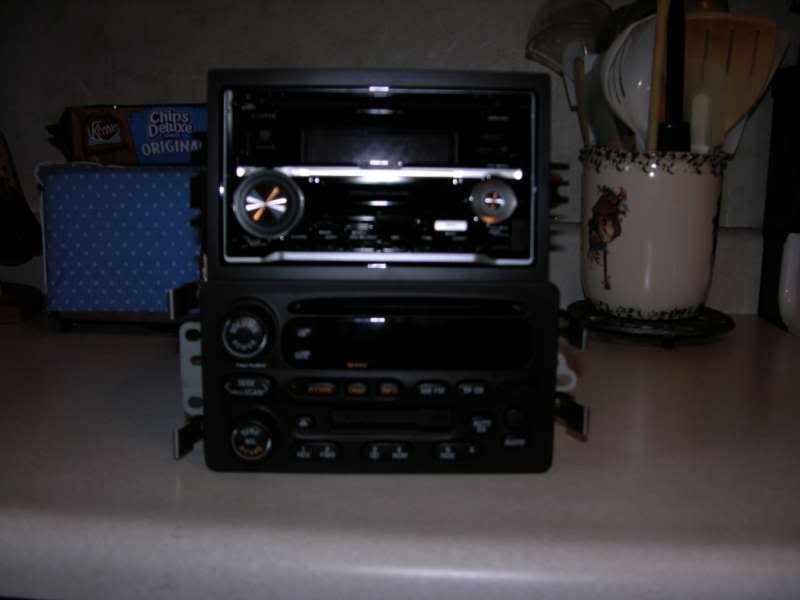
Here'* the unit fully installed in the dash. I'ts a perfect fit!
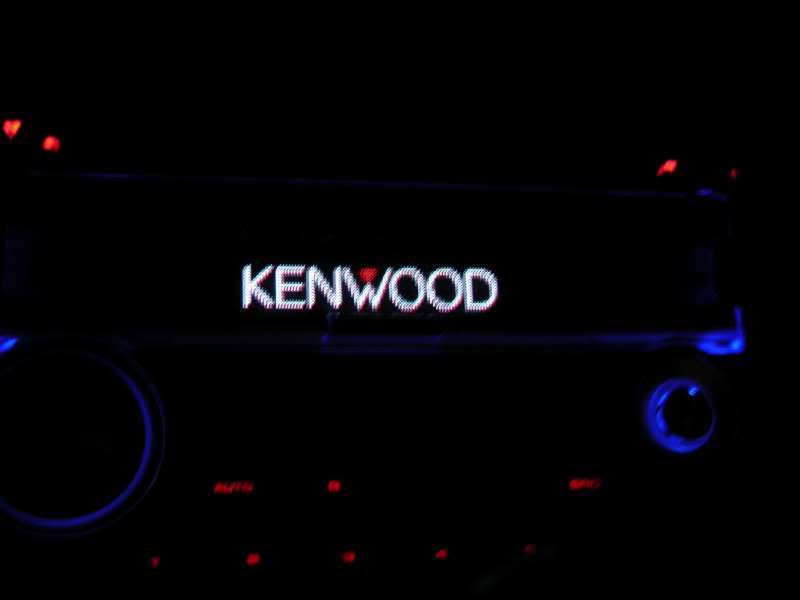
Here is what the display shows when you turn the unit on:
And while you play a cd or listen to the radio:
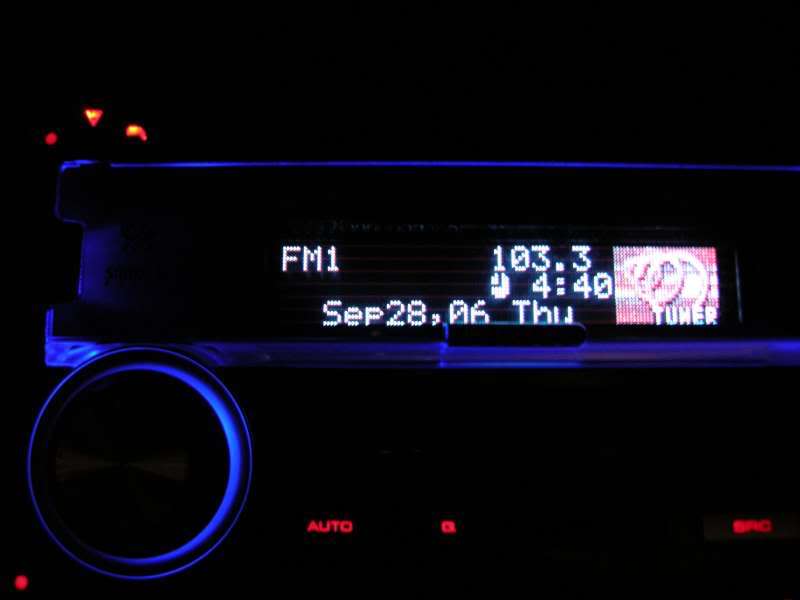
The color of the text can be changed to red/orange, yellow, white, or blue. I have it set on blue.
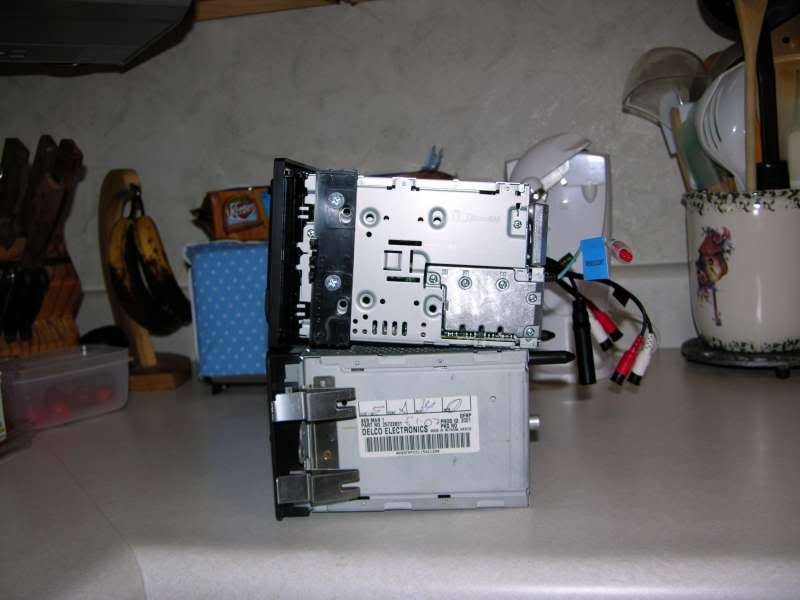
This is the wire harness that plugs into the factory ribbon cable. out of all these wires I only used TWO of them! the ground, and constant hot (yellow)..
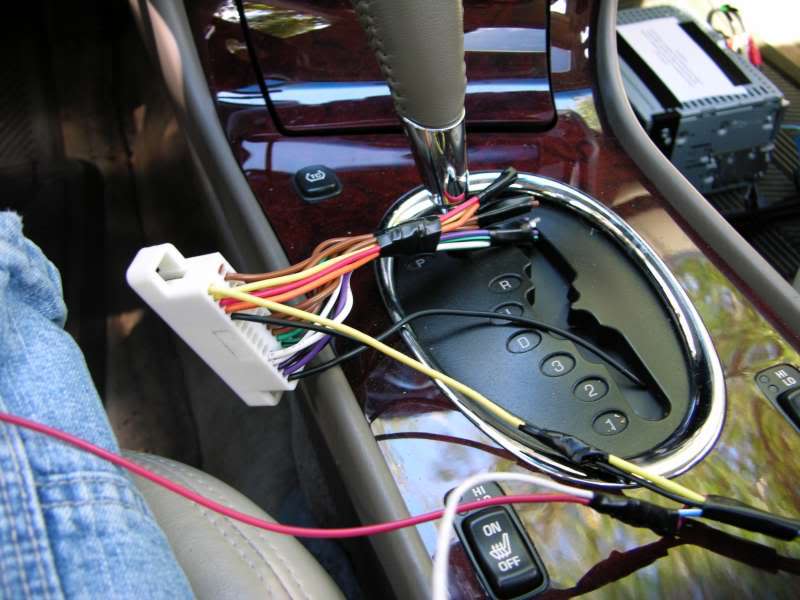
This is the Kenwood side of the harness.. only four wires connected here. switched ignition power (source is the positive side of cigarette lighter wiring), amp turn-on leed, ground, and constant hot.
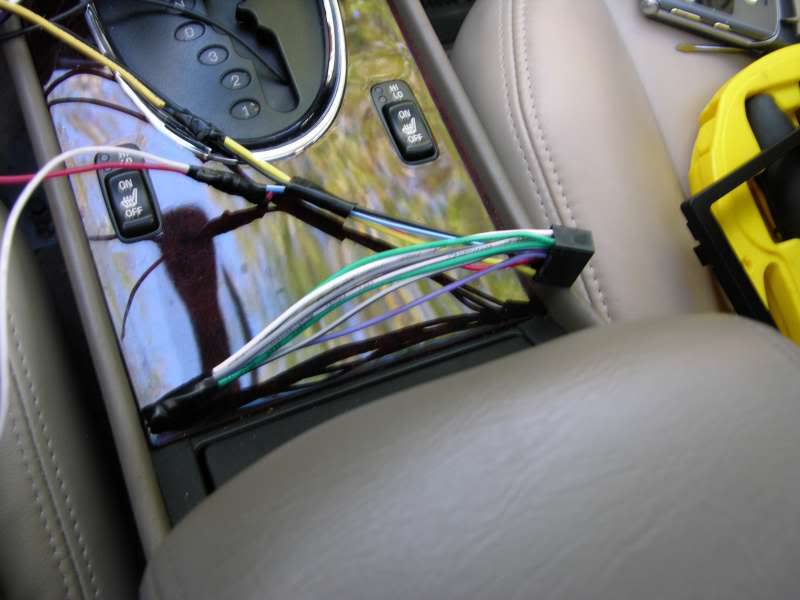
All connections are soldered. the ribbon cable AND the antennae MUST be unclipped from the back of the dash cavity to provide clearance! The both of them are just hanging behind the dash cavity. It'* all plastic behind there, so there'* not a worry of anything shorting out! You'll need a motorola style of antenna adapter for the 2000+ Bonneville.
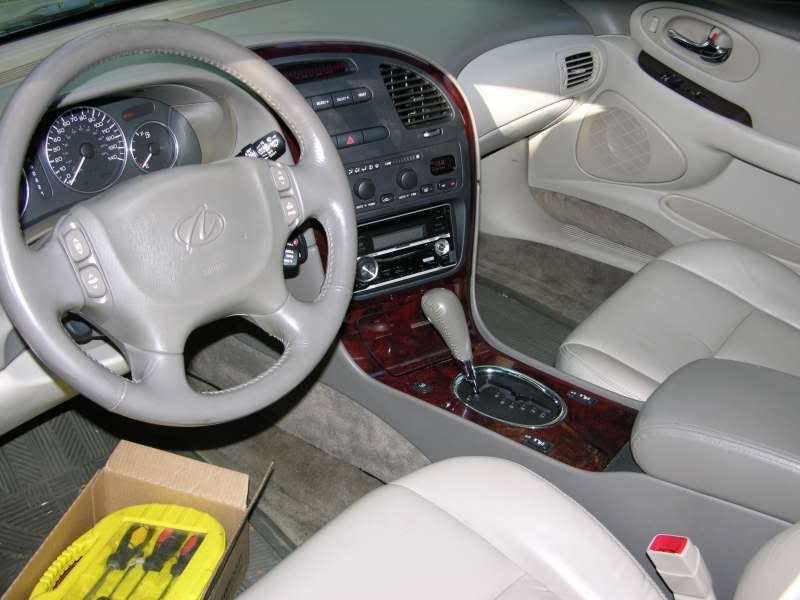
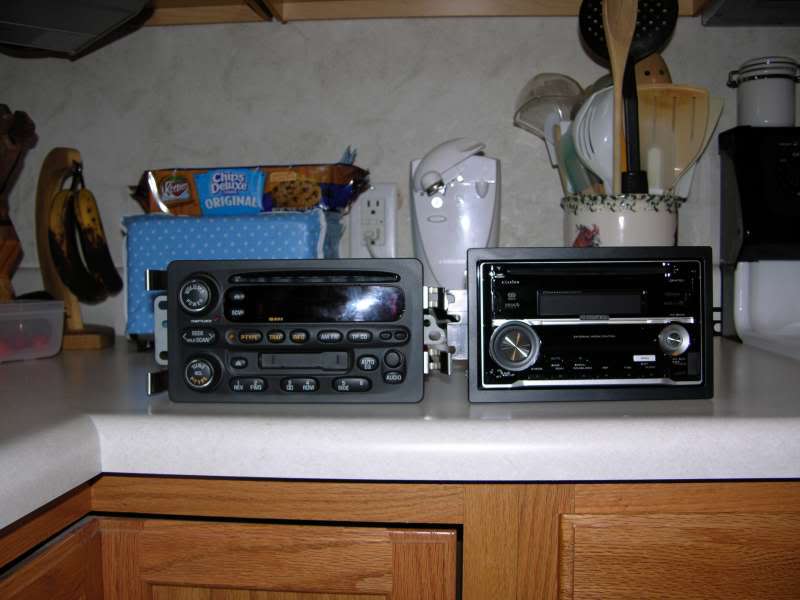
Last but not least, here'* the stock headunit in comparision to the Kenwood. They're very close in dimensions!
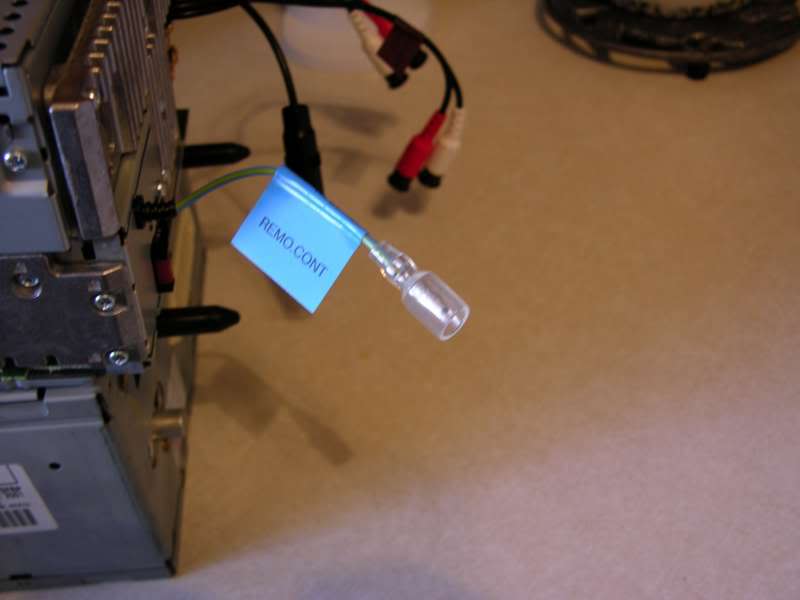
Here is the remote control wire to connect an adapter for my steering wheel controls.. I'm not sure where to get one, but I REALLY WANT to get one! Anyone know where I can get one??
In all, this job wasn't too bad, just had to be careful and measure things out! The installation in all took me right around 2 hours because of the cutting that was required to my dash. If it weren't for that, it wouldn't have taken so long! Also, if you don't use RCA cables, and jus tuse the internal amplifier, ther'es a chance you wouldn't have to cut the back of the dash. I cut it in a way however that the stock radio can be put back in if I so choose. Any questions or comments? Thanks!
Lastly, I would like to thank Aaron for his ideas and help throughout this project. It was really helpful to work with another person during this!! Thanks man!
It fit perfectly through the dash opening!!!
The only insallation issue I had (which was pretty major) was that the dash was not DEEP enough. Toastedoats (Aaron) warned me of this, and he was absolutely right!
The spots that I cut out of my dash cavity can be seen in the picture below. I didn't get an actual picture of what I did, but the whtie boxes below represent the areas I had to cut out for the wire harness (right) and the RCA cables (left) to fit through.
Here'* the unit fully installed in the dash. I'ts a perfect fit!
Here is what the display shows when you turn the unit on:
And while you play a cd or listen to the radio:
The color of the text can be changed to red/orange, yellow, white, or blue. I have it set on blue.
This is the wire harness that plugs into the factory ribbon cable. out of all these wires I only used TWO of them! the ground, and constant hot (yellow)..
This is the Kenwood side of the harness.. only four wires connected here. switched ignition power (source is the positive side of cigarette lighter wiring), amp turn-on leed, ground, and constant hot.
All connections are soldered. the ribbon cable AND the antennae MUST be unclipped from the back of the dash cavity to provide clearance! The both of them are just hanging behind the dash cavity. It'* all plastic behind there, so there'* not a worry of anything shorting out! You'll need a motorola style of antenna adapter for the 2000+ Bonneville.
Last but not least, here'* the stock headunit in comparision to the Kenwood. They're very close in dimensions!
Here is the remote control wire to connect an adapter for my steering wheel controls.. I'm not sure where to get one, but I REALLY WANT to get one! Anyone know where I can get one??
In all, this job wasn't too bad, just had to be careful and measure things out! The installation in all took me right around 2 hours because of the cutting that was required to my dash. If it weren't for that, it wouldn't have taken so long! Also, if you don't use RCA cables, and jus tuse the internal amplifier, ther'es a chance you wouldn't have to cut the back of the dash. I cut it in a way however that the stock radio can be put back in if I so choose. Any questions or comments? Thanks!
Lastly, I would like to thank Aaron for his ideas and help throughout this project. It was really helpful to work with another person during this!! Thanks man!

 09-28-2006, 10:13 PM
#3
Junior Member
Thread Starter
Join Date: Aug 2002
Posts: 0
Likes: 0
Received 0 Likes
on
0 Posts
Originally Posted by harofreak00
nice work!! that headunit is amazing... all that stuff to look at, and no need to flip anything

Here'* the unit on Kenwood'* page if anyone wants to look at it.
http://www.kenwoodusa.com/products/L...k3=173&pr=2376


 09-28-2006, 11:05 PM
#8
Senior Member
True Car Nut

Join Date: Jul 2006
Location: Granville, Ohio ~NEBF '07 Survivor~
Posts: 5,001
Likes: 0
Received 0 Likes
on
0 Posts
Originally Posted by 1993 SLE
you donot use that remote wire for the steering wheel controlls
you get a PAC SWIX and then go from there
you get a PAC SWIX and then go from there
09-28-2006, 11:08 PM
#9
Junior Member
Thread Starter
Join Date: Aug 2002
Posts: 0
Likes: 0
Received 0 Likes
on
0 Posts
Originally Posted by petraman
Originally Posted by 1993 SLE
you donot use that remote wire for the steering wheel controlls
you get a PAC SWIX and then go from there
you get a PAC SWIX and then go from there

