the 2000 sunroof drain fix (20+ 800x600 pics)
 01-27-2007, 12:59 PM
#1
BANNED
Thread Starter

Join Date: Mar 2004
Location: Purgatory
Posts: 0
Likes: 0
Received 0 Likes
on
0 Posts

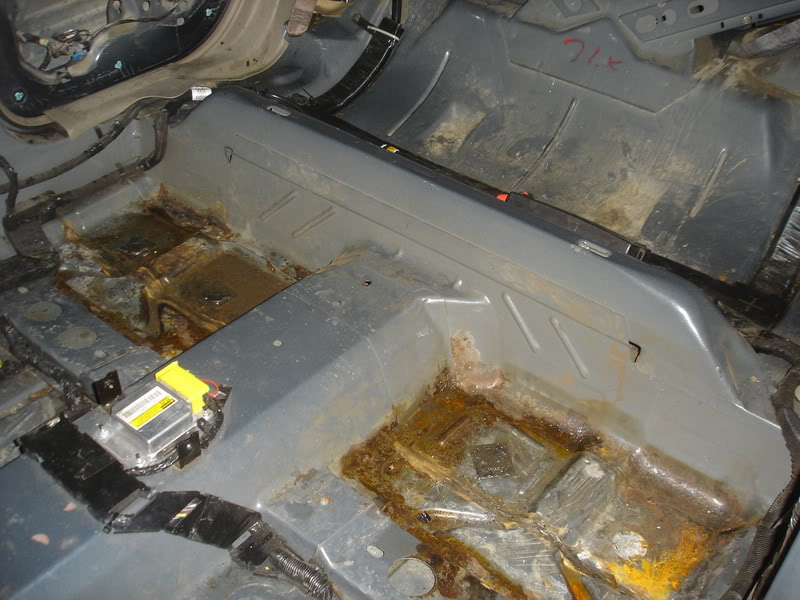
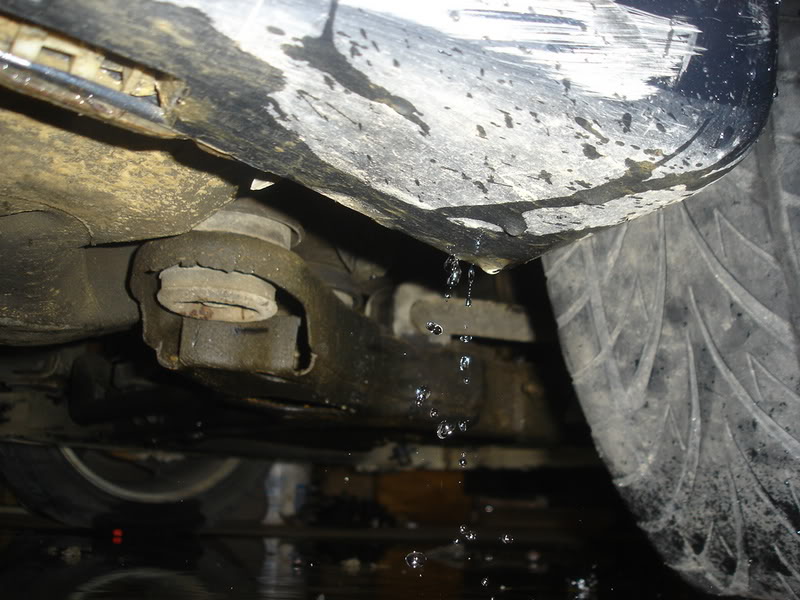
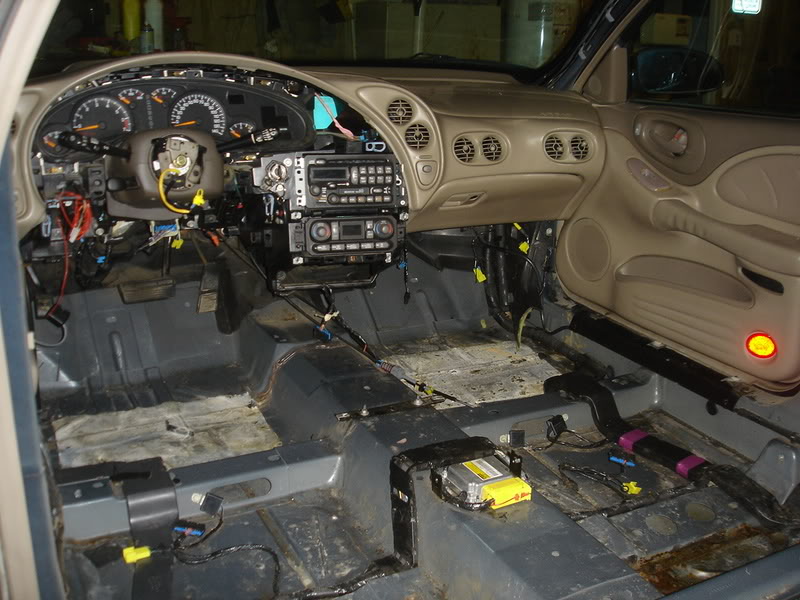
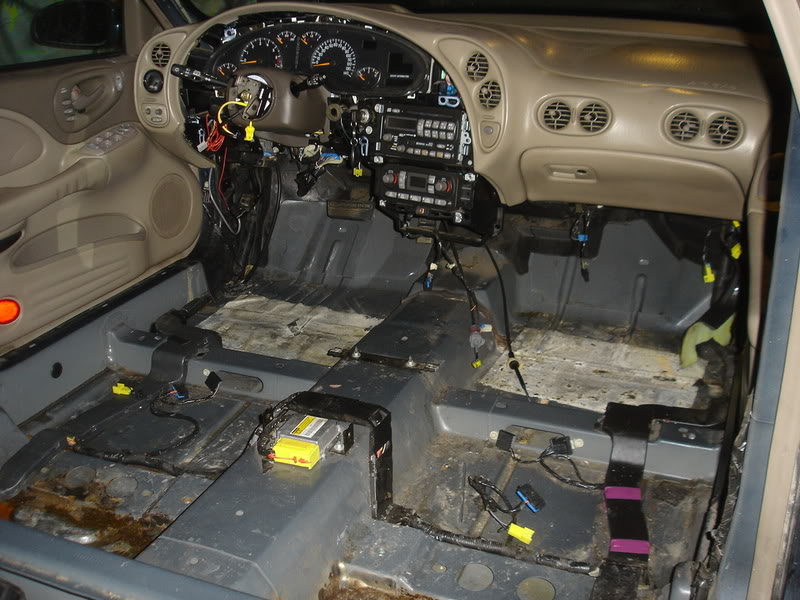
i never would have known i had this problem until i pulled the carpet up. there was a little pool in the rear floor. the carpet is rubber bottomed, so no water will NOT pass through it to show you visible signs of water leaks. the water sits there, drain free, for days, months, years... obviously years in my situation...
after i had most of the interior pulled out for inspection, i started by checking the door seals for leaks... i found nothing... so i moved onto the sunroof...
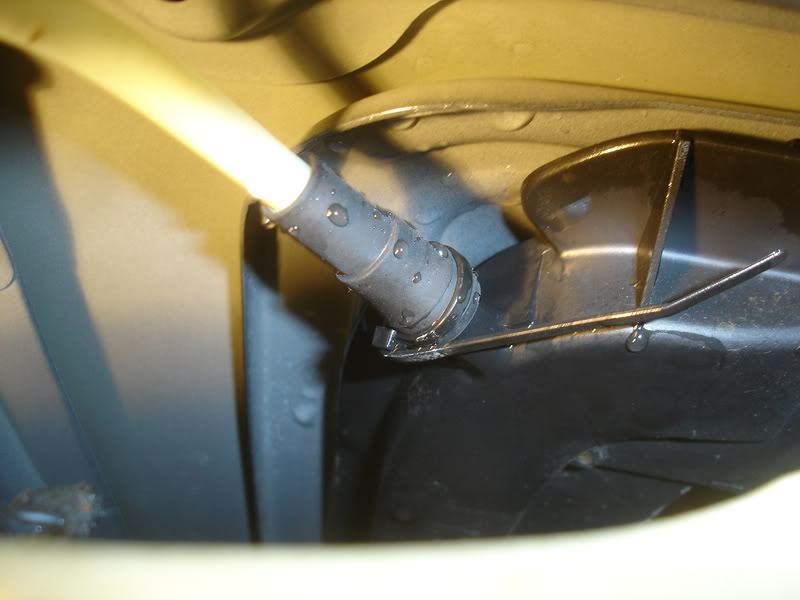
i first noticed water pooling up in the rear floorboards, exactly where it had been rusting away for years... i traced the stream of water all the way up to the firewall to this little hole
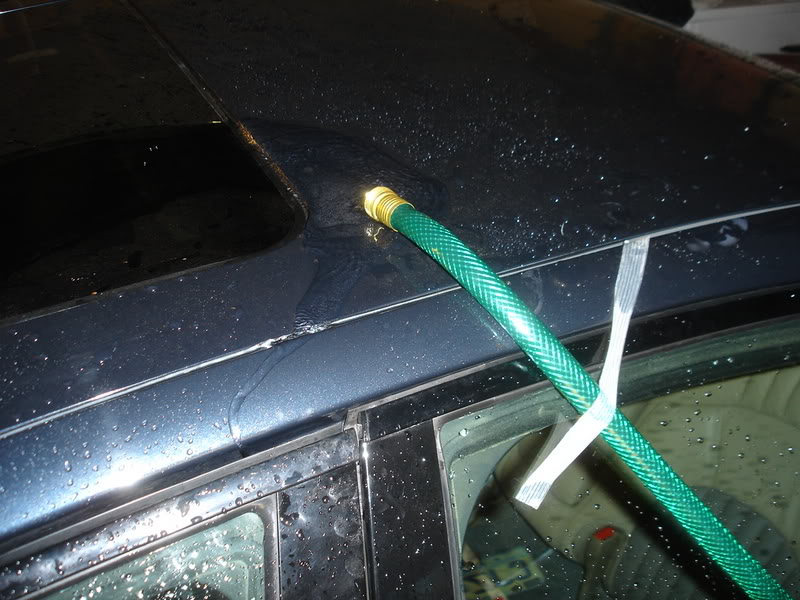
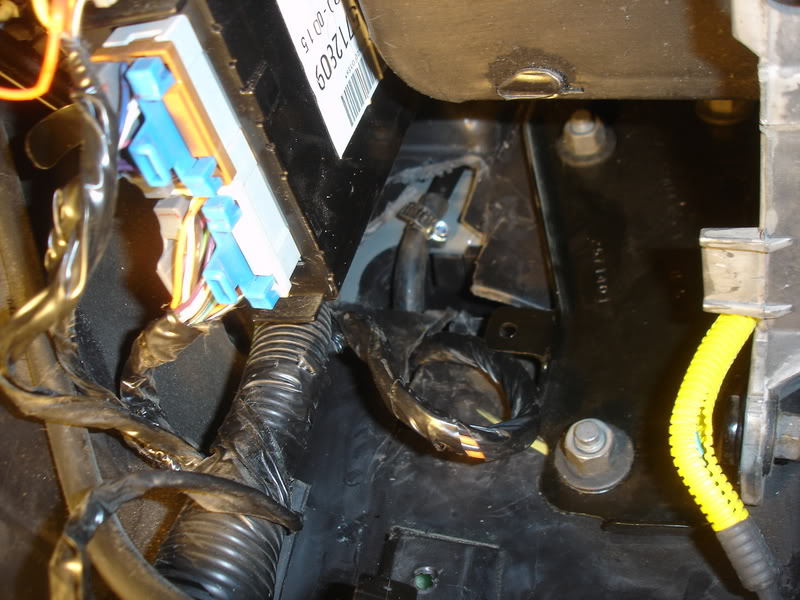
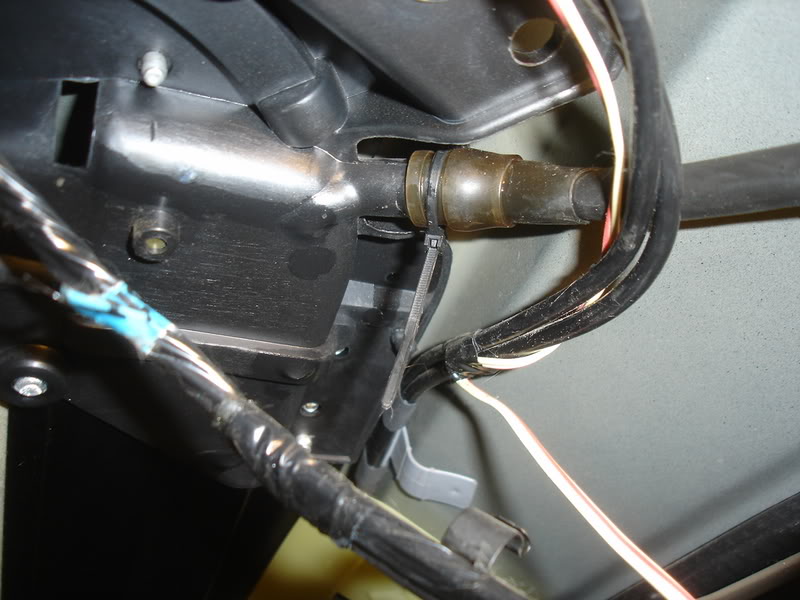
after an hour later trying to figure out exactly why it would be coming out from there, pulled the ENTIRE interior out, A B & C pillars to inspect the drain lines... the driver drain was white, the passenger drain was black... i pulled the drain lines out of where they came from, because i could not see where any of the water was going before coming out of the unibody holes
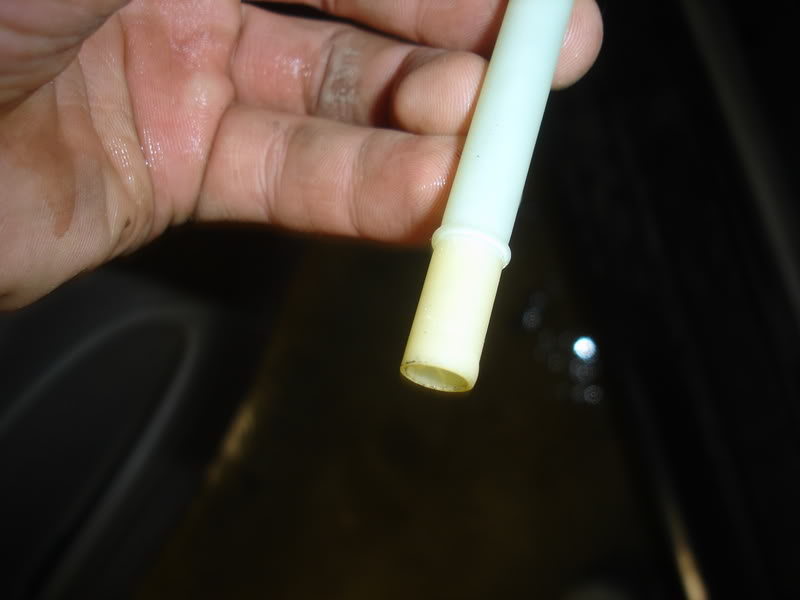
this is the end of the drain hose, it obviously connects to something, but nothing visible
at this point i figured it would be easiest to run custom drain lines and make them go where i wanted them... but before that i started cutting...
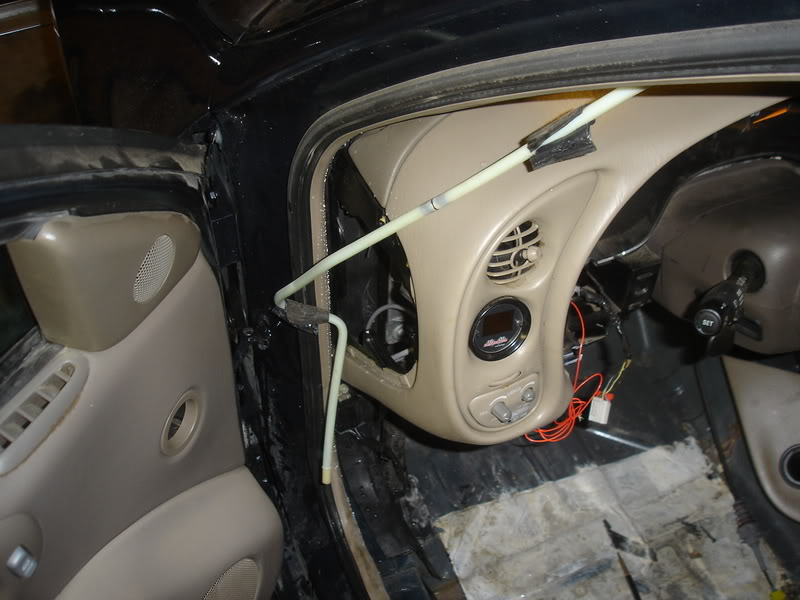
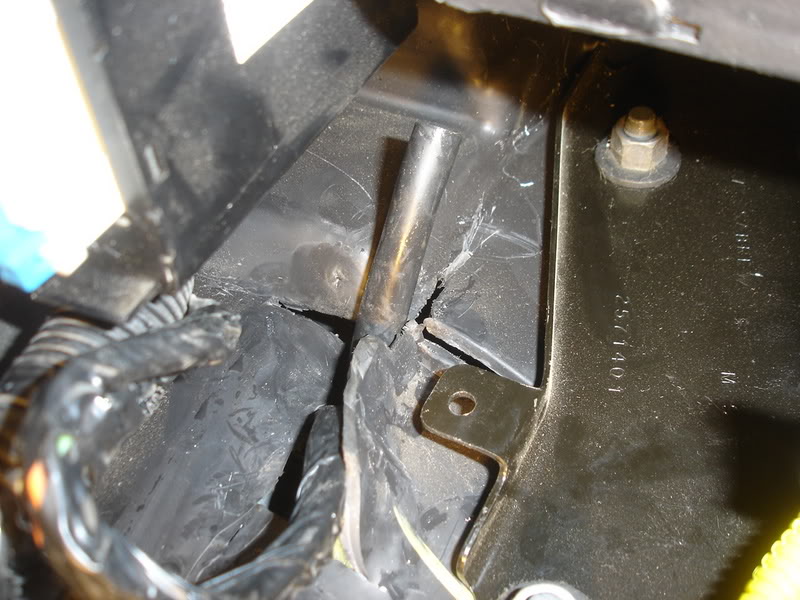
the entire firewall and front floorboards on the 2000 bonneville are covered with a rubber cover, that is unremovable without removing half of the dash... i did not want to do this.. so i started cutting to where i thought the drain lines would be going... i found the exact spot on the first cut...
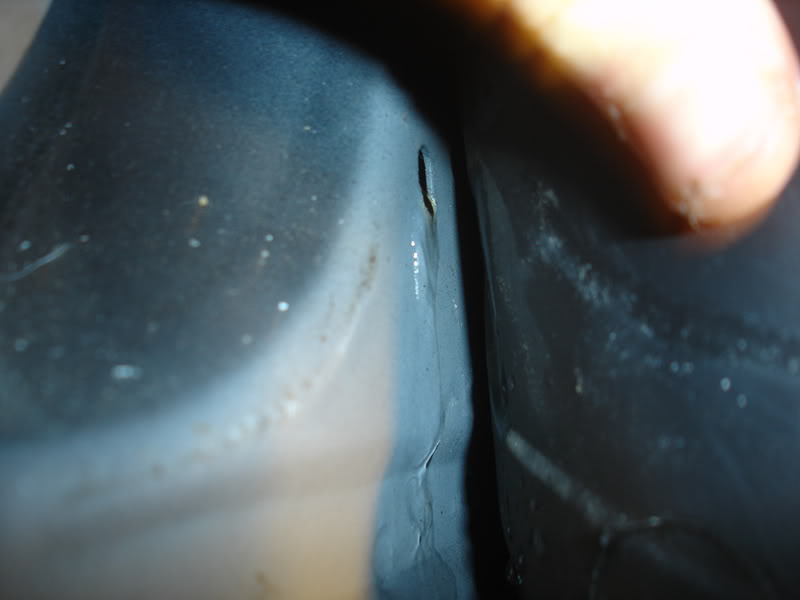
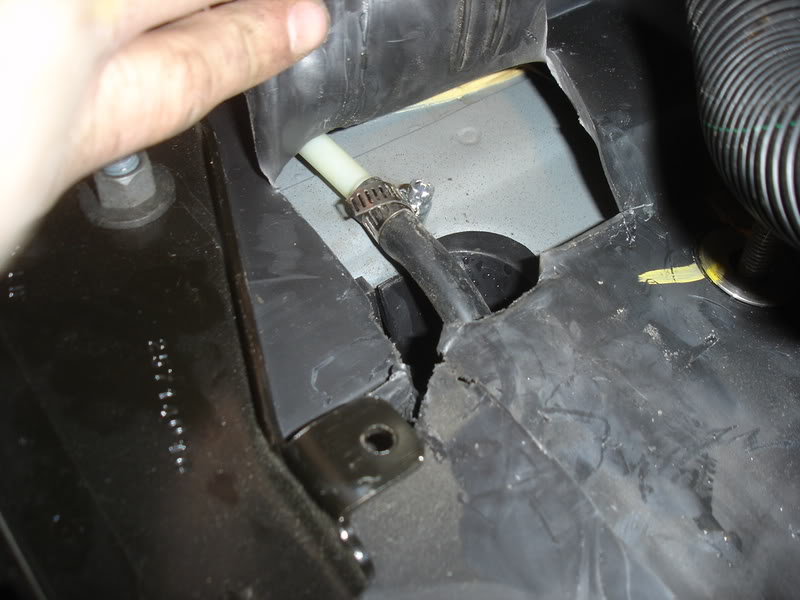
this is the bottom piece of the drain line, a very thin flexible rubber, unlike the upper piece... it drains out to behind the front tire
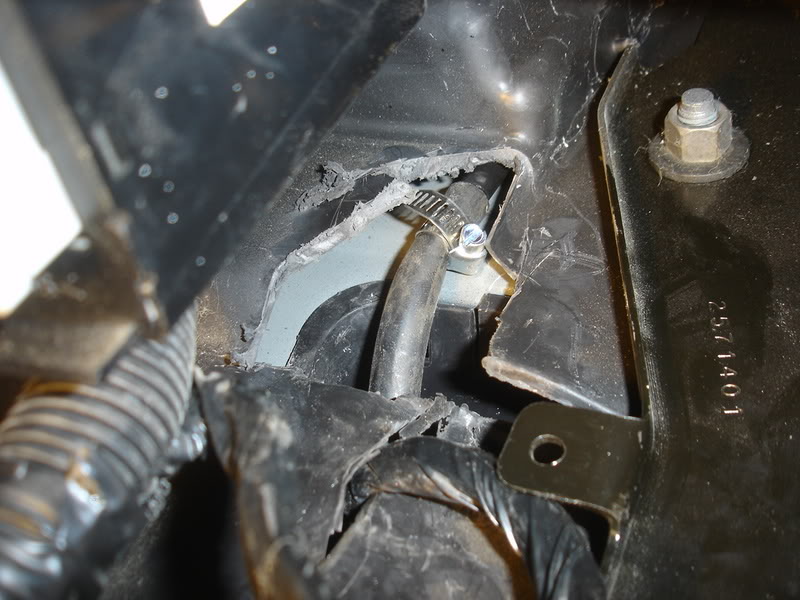
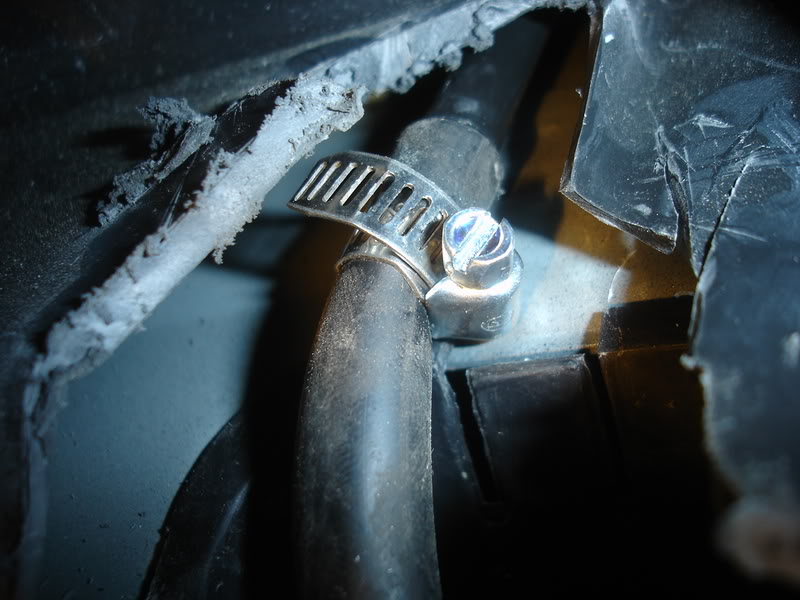
after some more cutting, i was able to connect the drain lines to eachother and put a hose clamp on them...
on the driver side, you need to remove the parking brake pedal, its right behind there... i cut a flap
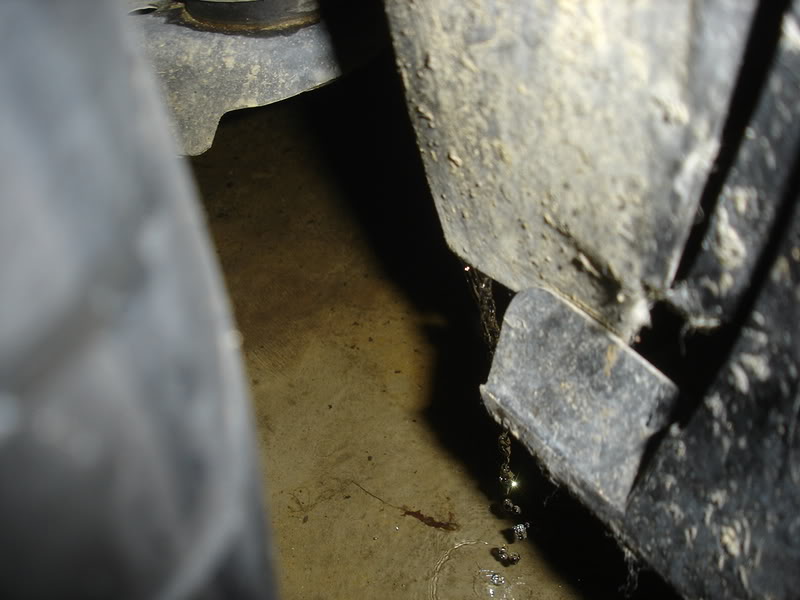
after testing, this is where the water goes...exactly where it should.. behind the front wheels..
now.. the rear drains... i had two problems with my rears...
1. there was a twig stuck in the drain line right about where it connects to the hose
2. the drain line was kinked in several places causing ZERO flow
the drain line is hard plastic, so i just heated the line and reformed it to shape and when it cooled it was hard, and drainable again... also removed the twig
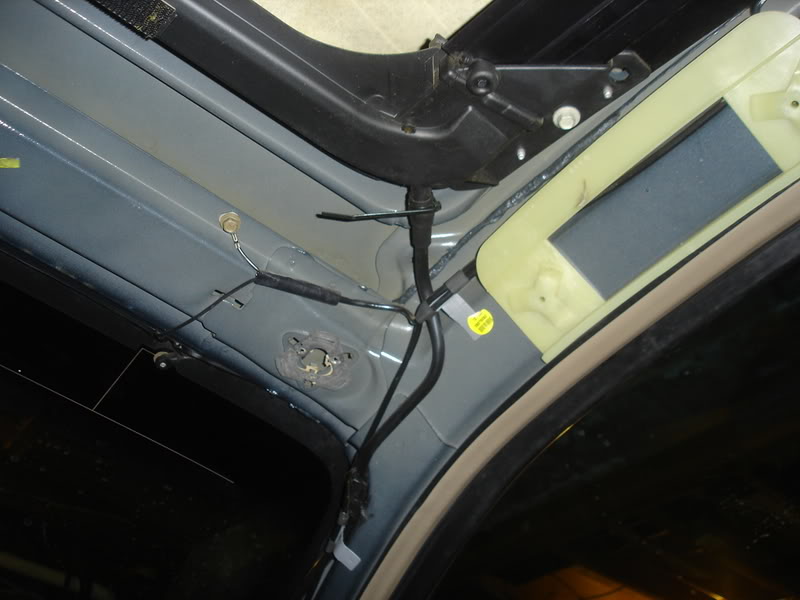
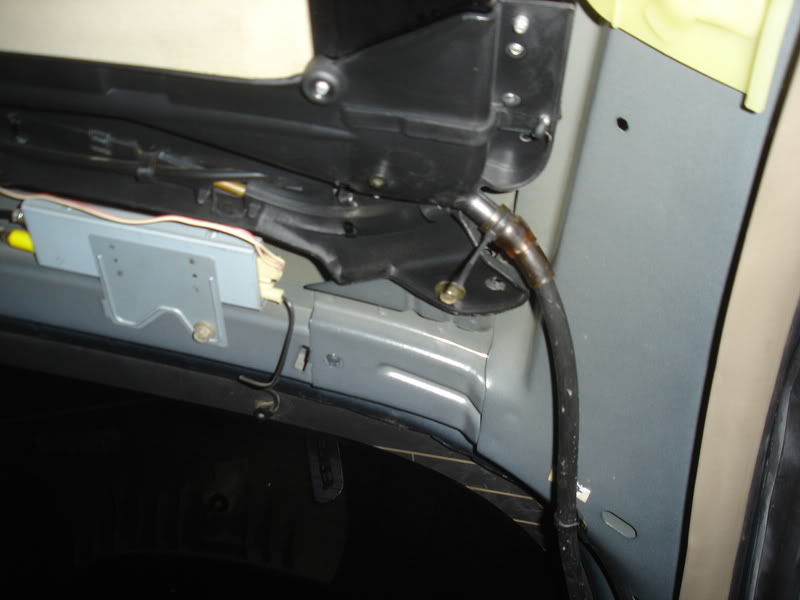
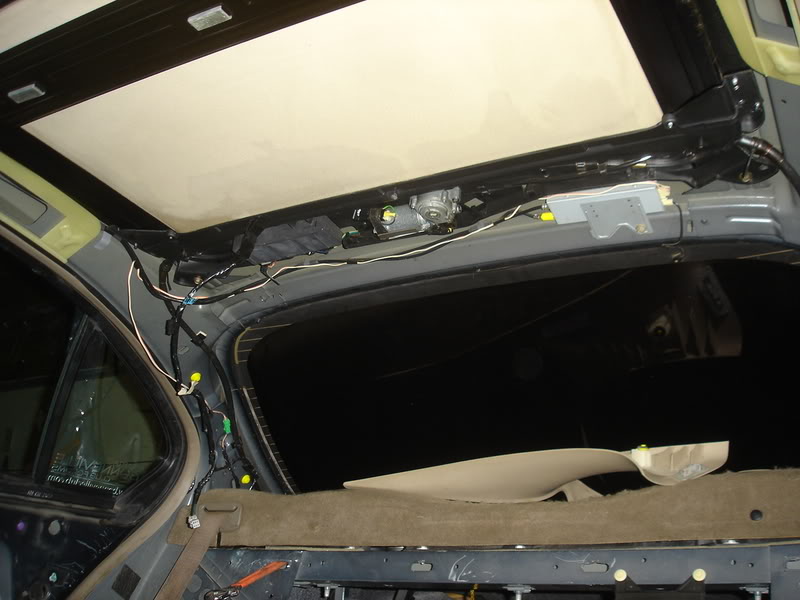
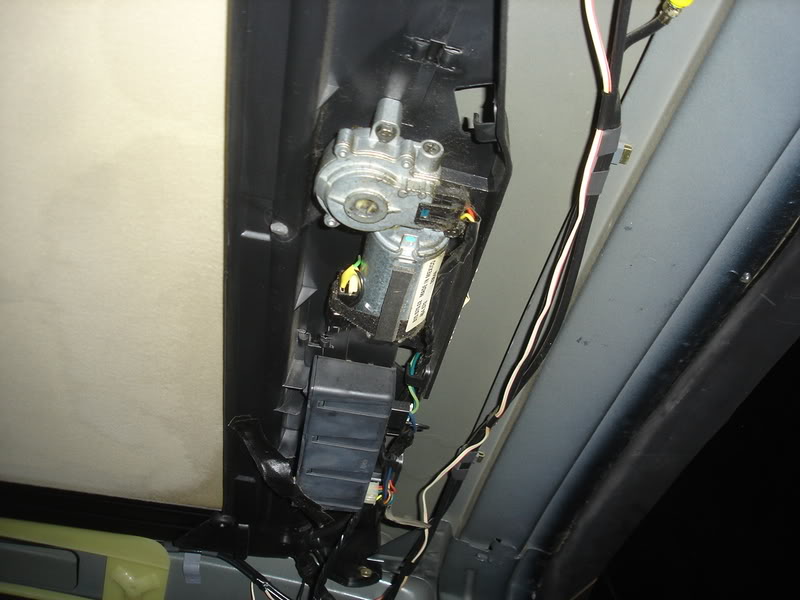
here are just come pics for reference if anyone wants to know whats under the headliner...
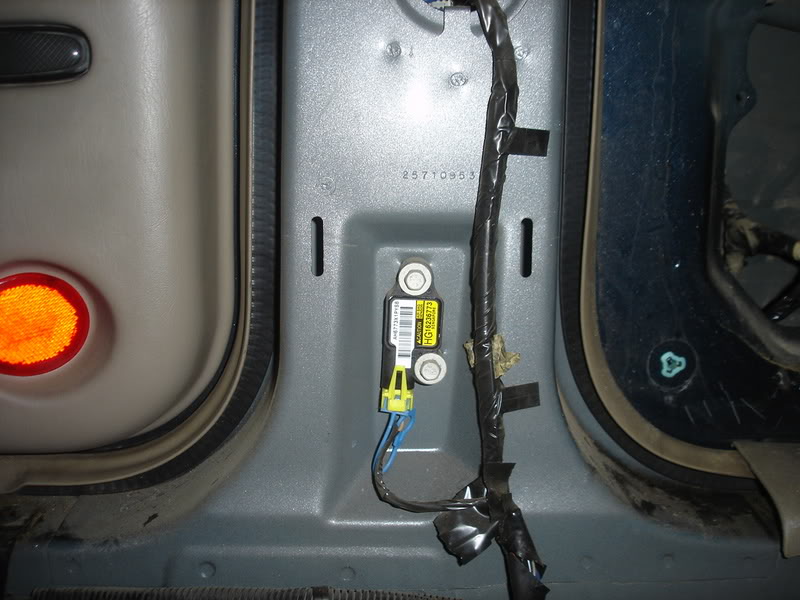
here is the side airbag sensor
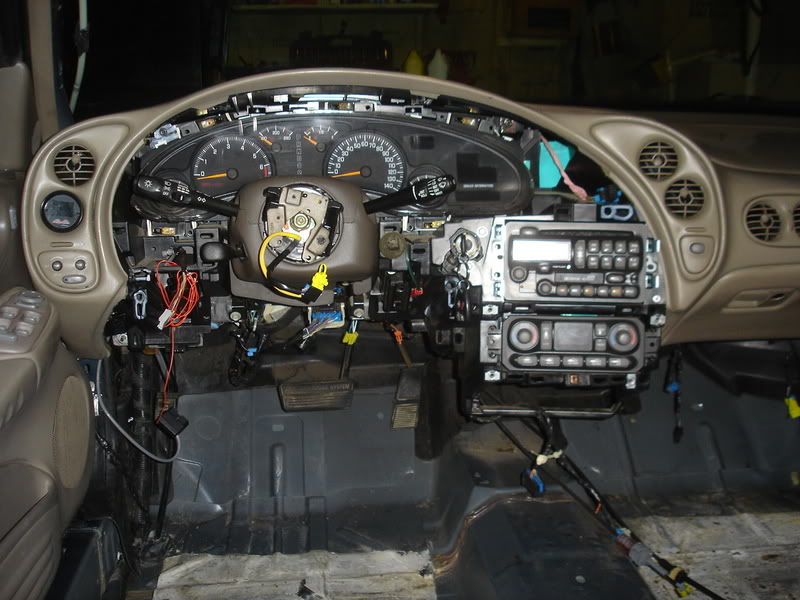
here is my poor naked baby
after i had most of the interior pulled out for inspection, i started by checking the door seals for leaks... i found nothing... so i moved onto the sunroof...
i first noticed water pooling up in the rear floorboards, exactly where it had been rusting away for years... i traced the stream of water all the way up to the firewall to this little hole
after an hour later trying to figure out exactly why it would be coming out from there, pulled the ENTIRE interior out, A B & C pillars to inspect the drain lines... the driver drain was white, the passenger drain was black... i pulled the drain lines out of where they came from, because i could not see where any of the water was going before coming out of the unibody holes
this is the end of the drain hose, it obviously connects to something, but nothing visible
at this point i figured it would be easiest to run custom drain lines and make them go where i wanted them... but before that i started cutting...
the entire firewall and front floorboards on the 2000 bonneville are covered with a rubber cover, that is unremovable without removing half of the dash... i did not want to do this.. so i started cutting to where i thought the drain lines would be going... i found the exact spot on the first cut...
this is the bottom piece of the drain line, a very thin flexible rubber, unlike the upper piece... it drains out to behind the front tire
after some more cutting, i was able to connect the drain lines to eachother and put a hose clamp on them...
on the driver side, you need to remove the parking brake pedal, its right behind there... i cut a flap
after testing, this is where the water goes...exactly where it should.. behind the front wheels..
now.. the rear drains... i had two problems with my rears...
1. there was a twig stuck in the drain line right about where it connects to the hose
2. the drain line was kinked in several places causing ZERO flow
the drain line is hard plastic, so i just heated the line and reformed it to shape and when it cooled it was hard, and drainable again... also removed the twig
here are just come pics for reference if anyone wants to know whats under the headliner...
here is the side airbag sensor
here is my poor naked baby
 01-27-2007, 01:09 PM
#2
Junior Member

Join Date: Jun 2002
Posts: 0
Likes: 0
Received 0 Likes
on
0 Posts
Nice shots Haro.
Should sticky for reference.
Wow you really have it stripped down good.
Can you tell us what is involved in removing the rear deck cover. Some of us will be doing that at Tint day during WCBF07.
Should sticky for reference.
Wow you really have it stripped down good.
here are just come pics for reference if anyone wants to know
Can you tell us what is involved in removing the rear deck cover. Some of us will be doing that at Tint day during WCBF07.
01-27-2007, 01:31 PM
#4
BANNED
Thread Starter
Join Date: Mar 2004
Location: Purgatory
Posts: 0
Likes: 0
Received 0 Likes
on
0 Posts
Originally Posted by 2000SilverBullet
Can you tell us what is involved in removing the rear deck cover. Some of us will be doing that at Tint day during WCBF07.
ill tell ya this.. it does NOT just slide out like the 92-99 style.. there are some hidden connectors holding the back down
01-27-2007, 09:29 PM
#6
Junior Member
Join Date: Jun 2002
Posts: 0
Likes: 0
Received 0 Likes
on
0 Posts
Option 1: Removing rear shelf.
Lift up on rear seat bottom and remove from vehicle. There are Several bolts at the bottom of the seat back that hold the seat in, aswell as the seatbelts, remove all these bolts.
At the top of the seats if you pull back on the seatback you will be able to see 4 black clips that hold the seat in, use a screwdriver to depress the clips and the seat should come loose.
Now you have to remove the pillar covers from the sides of the passenger comaprtment, these are just held in with b ody clips aswell, just pull on them and remove.
The rear shelf cover is next to come off. ghuess what.... more body clips. pop the body clips loose and you in business. reverse to re-assemble
I think if I'm going to this much trouble to tint the back window, might as well replace the rear speaker while I'm in there.
01-27-2007, 09:48 PM
#7
Senior Member
Posts like a Camaro

Join Date: Nov 2004
Location: Portage, Michigan
Posts: 1,134
Likes: 0
Received 0 Likes
on
0 Posts
wow i can always depend to learning something new with haro'* post. Nice pics and info.good to have someone like yourself in this forum/club.
tony
tony
01-28-2007, 02:29 AM
#8
Senior Member
True Car Nut

Join Date: Jun 2003
Location: Purgatory
Posts: 6,313
Likes: 0
Received 0 Likes
on
0 Posts
1. Remove the rear seat.
2. Remove the seat belts escutcheons from the rear shelf.
3. Remove the push-in fasteners at the front of the rear shelf trim panel.
4. Feed the center seat belt through the opening in the rear shelf trim panel.
5. Slide the outer seat belts through the slots in the rear shelf trim panel.
6. Remove the rear shelf trim panel.
