94 SE - Cooling system rebuild begins


 10-03-2011, 09:36 AM
#23
Senior Member
Posts like a Turbo
Thread Starter

Join Date: Jun 2009
Posts: 363
Likes: 0
Received 0 Likes
on
0 Posts

Yes that'* what I was expecting. I was hoping I could float it on the lines and move it a4-6 inches without disconnecting anything. Think that'* possible? I played with it for a little bit, but couldn't find out what was securing it for sure.
10-03-2011, 12:11 PM
#25
Senior Member
Posts like a Turbo
Thread Starter
Join Date: Jun 2009
Posts: 363
Likes: 0
Received 0 Likes
on
0 Posts
Yeah, I think I'm going to have to forget about the heater hoses for now. The heater end are in great shape. can I just cut the damaged ends off? They are bulging slightly too though.
10-04-2011, 02:12 AM
#27
Senior Member
Posts like a Turbo
Thread Starter
Join Date: Jun 2009
Posts: 363
Likes: 0
Received 0 Likes
on
0 Posts
Cut the ends of the hoses off. There was plenty of length on them. They look new again! Also used some other clamps I had laying around from my previous adventures.
Well she'* all back together and running. I already found a few leaks though. A bit frustrating I must say...
One in the coolant elbow. I debated putting RTV on since the O-ring on there was just about useless. But I figured well it worked before... Yeah don't use that theory. This is easy enough to fix later though. Also another one on the end of the intake near the throttle body. This is where it was leaking from before too. I'm wondering if there is something else leaking there? I was very careful cleaning the surfaces and using proper torque. I felt like I did a pretty good job minus the few hiccups I hit with the tools.
She'* still smoking because she hasn't taken in enough coolant yet, so I'll have to take her out of the garage (so I don't set off my apartment fire alarm...) in the morning and let her smoke for a bit and take in some coolant.
I used RTV on the water pump pipe and that seems to be holding well for the time being. I only had red RTV which I know isn't really what is ideal, but I ran out of my other stuff for the WP gasket.
I have some pictures I'll post within the next few days (not great, but some), some advice, some yada yada yada... right now it'* 1 am and I've been torquing on rusty 17 year old bolts for the past three days. My body is actually threatening to dismember itself. I'm going to bed.
Thanks everyone for all the help. It'* very much appreciated.
10-14-2011, 11:36 PM
#28
Senior Member
Posts like a Turbo
Thread Starter
Join Date: Jun 2009
Posts: 363
Likes: 0
Received 0 Likes
on
0 Posts
Alright, sorry this took me a little longer to get back than expected. I'm going to give my tips for radiator, UIM, LIM gaskets, and water pump replacement. I have a few pictures, most of which probably won't really help anyone.
My first recommendation is if you only have one weekend, don't try to do all three of these if you haven't done these before. I had done the LIM/UIM gaskets once before and I still barely got this done. The water pump and broken tools consumed a lot of time though. If you're doing the pump, don't forget to break the pulley bolts loose before removing the serpentine belt.
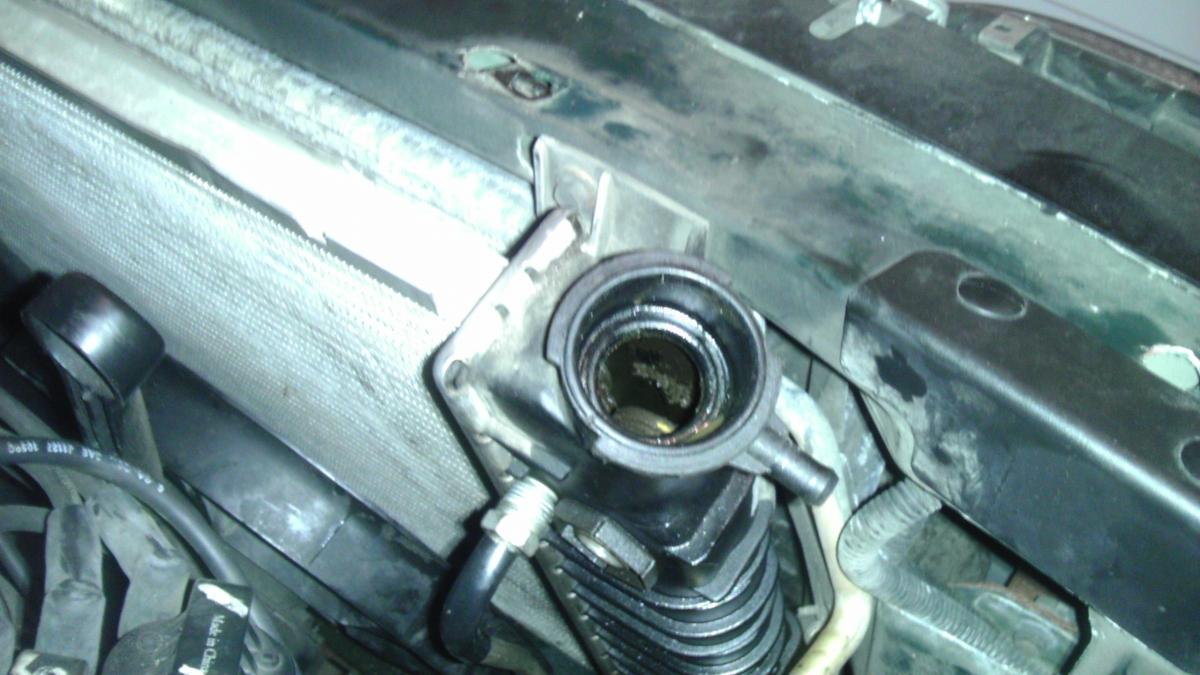
So the first thing I did was go at the radiator. This job is CAKE. Drain the fluid, take out the air box, remove hoses, remove upper fan bolts, and radiator cover bolts. The only tough part is the trans cooler lines. I used some liquid wrench on these the night before to make them a little easier to loosen because they can be a bit fragile. However, unless you take the fans all the way out, the bottom line is a knuckle buster and there'* no way around it. If you have a long wrench, you're going to want it. Once you've done all these steps, the radiator lifts right out. Ordinarily if you're just doing to the radiator you'd put it back in at this point, but I left mine out since the more room I had the better for upcoming items. It probably really didn't make a difference, but that was my thought process. Oh, take the battery all the way out of the car. Having that extra space will make getting the LR hose and the trans cooler lines much simpler. Here'* a picture of inside my old radiator. You can see some gunk was definitely building up. I also found this in my lower intake later.
From there I moved on to the UIM / LIM gasket job. One thing I made the mistake of this time around was I didn't have a backup O-ring for the coolant elbow. Just buy one and replace it. It'* much easier than fixing the leak afterwards trying to save a few dollars. This really isn't too bad of a job it just takes time. Initially I thought I had a slow leak. However, it turns out I didn't. Here'* a look at what I had coming out from below the throttle body:
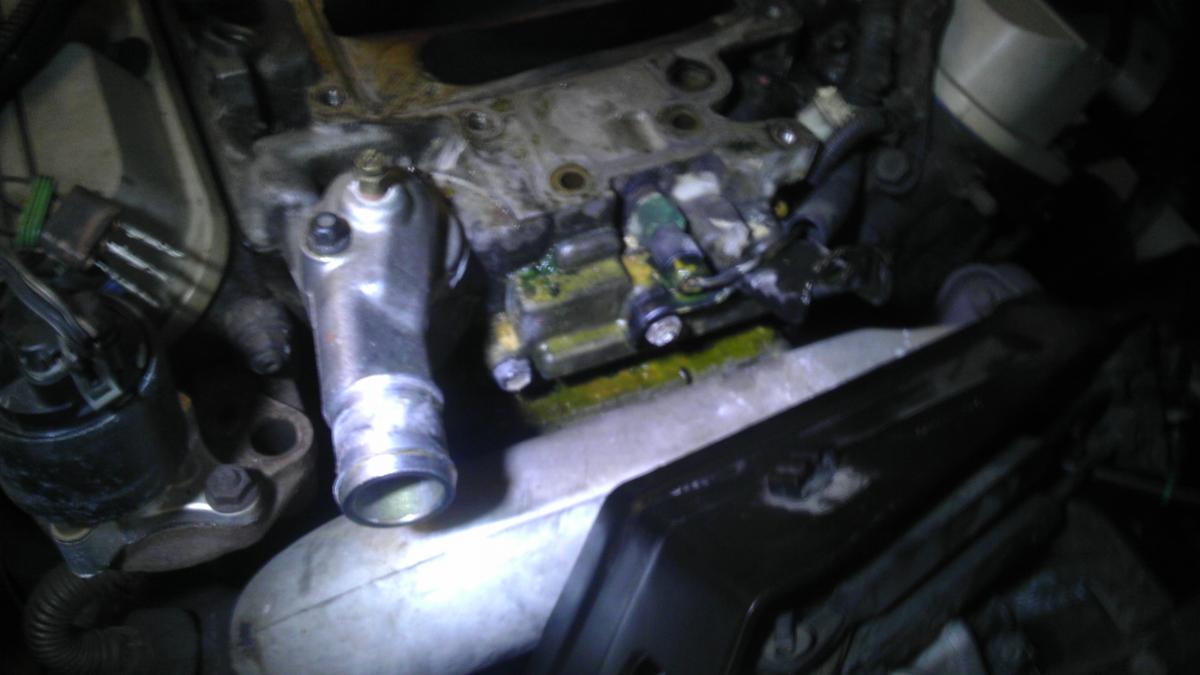

From there read DanThurs' write up on it. It didn't line up perfectly with my model, but it was close enough. In my opinion, if there is something that doesn't need to come out but is in your way, take the thing out. Often times it only takes a couple of bolts to get it out and you will much appreciate the open space. It'* hard to see, but you can see some of the gunk similar to what was in the radiator here:
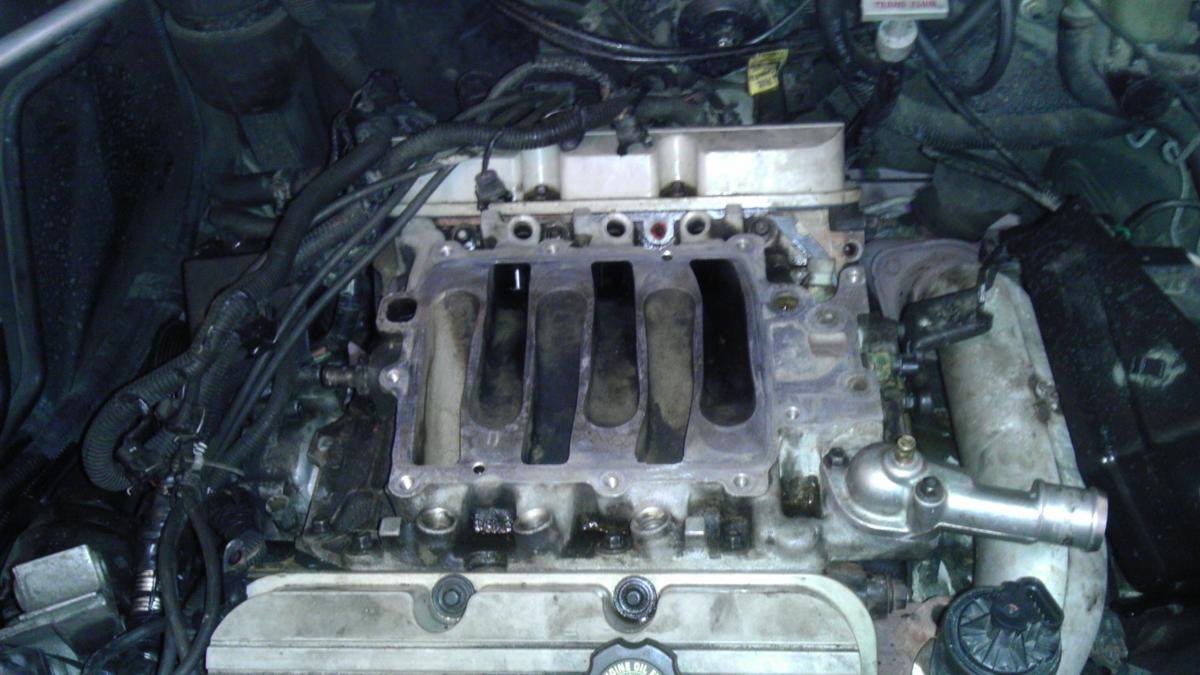
Take your time and get these surfaces nice and clean. Take it from someone who had to redo it two years later, it'* worth your time to do this right. This time around I found using a clean rag you can get 80% of the building from the old gaskets off. Then between brake cleaner, more rag, and a gasket scraper you can get it pretty good. I'm no expert, but I went until it felt smooth to the touch. Like I said, take your time and be careful not to scratch the surfaces. Note the rag I have covering the lifter valley, that'* an important precaution to keep debris from falling in.
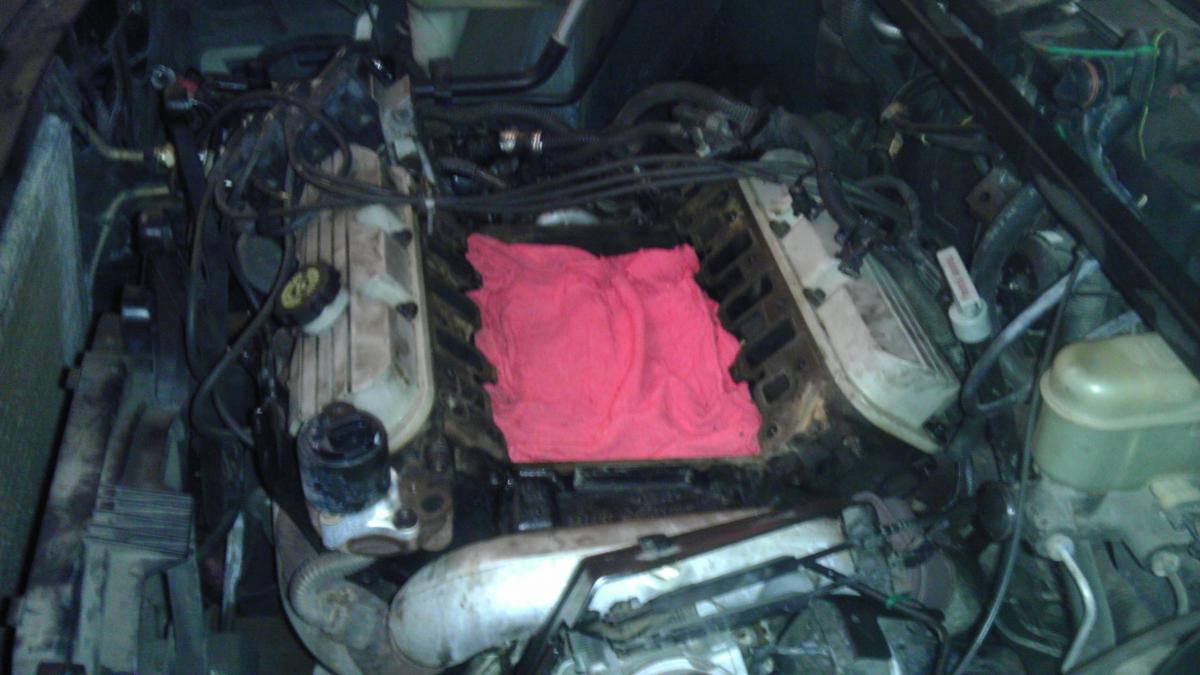
Don't forget to clean the underside of the surface which will sit here upon reinstallation!
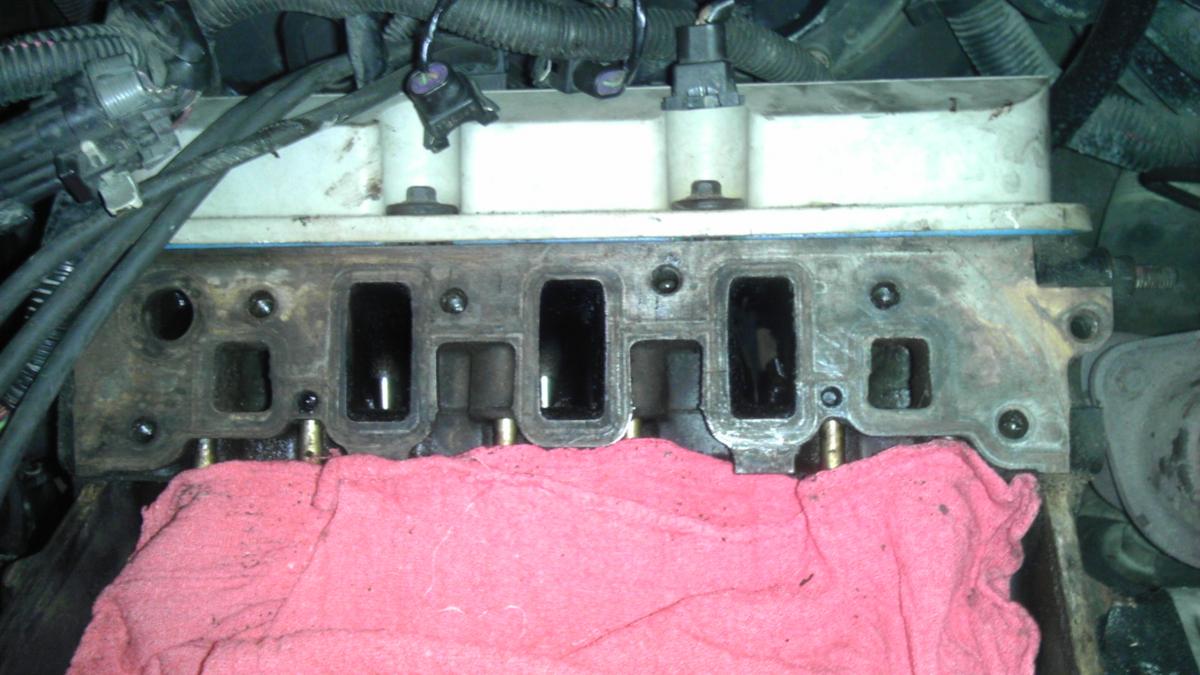
Same thing with the upper intake, get all areas where gaskets will sit very clean. This is mine before hand, forgot to take an aftershot but these cleaned up very nicely for me:
From this point I moved on to the water pump. This job is not easy. The passenger side engine mount and bracket must be removed in order to get the pump off. If you're going to attempt this job, make sure to have a quality socket and extension. I sheared my extension and ruined my socket and had to take a cab to Home Depot the next day. You don't want to be me. You'll want a quality 12-18" breaker bar too. I used the one that is meant to be for my hydraulic jack. You'll need to lift the engine from below to take some pressure off of the mount bolts. I used a 2x4 just a bit wider than the oil pan and a hydraulic jack. I was skeptical at first, but it worked no problem.
I took all of the accessories near the water pump out to free up the space (PS Pump, alternator, tensioner, ICM bracket). I was very glad I did. In fact, you might need to to get to some of these bolts.
First remove the through bolt on the torque axis engine mount. Spray lots of Liquid Wrench or your choice of penetrating oil and let it sit for a while. I did mine over 24 hours before I went at it and it was still a bear to get these bolts off. From there, I cracked the two top bolts of the torque axis engine mount loose, then went after the bottom two. To get to the bottom two, you may need to adjust the height of your engine relative to the frame (I think lift it up so the engine mount is sitting in the bracket). I was able to access these from above the car, one from each side of the bracket. I've read a lot of people go underneath though. My way worked fine. I did a lot of lowering/lifting the engine to get these four bolts free. I then had to lower the engine quite a bit in order to get this mount off. Next take the mount bracket to the engine off. These bolts aren't as bad, but still no fun. Get some oil on these as well. If you've made it this far, you're in the stretch. Here'* what I had:
Even if you've already drained your cooling system from doing something else, take my word for it, there is still a lot of coolant ready to come out of those bolt holes. Put your drain pan or whatever you're using under because as soon as that first bolt comes out a stream is going to be flowing for a minute or so. These bolts all come out pretty easy, but my pump was stuck to the block pretty well. A little playing with it and it came off though. Here is the result:

This surface was very difficult to clean. I'm not sure why, but something about the compound/gasket used on here was ultra tough. Leave a lot of time for this step. This is a critical part. Note my rag I put over the crankshaft position sensor. I had a lot of coolant dripping out from that area still and the last thing I wanted to be doing was ruining my sensor, so I highly recommend it as a precaution. Clean her up, put the new one one, use some water pump sealant and new gasket and you're off for the races. Reassemble in reverse order. Hand tighten pulley bolts. Don't forget to tighten to spec once the belt is back on!
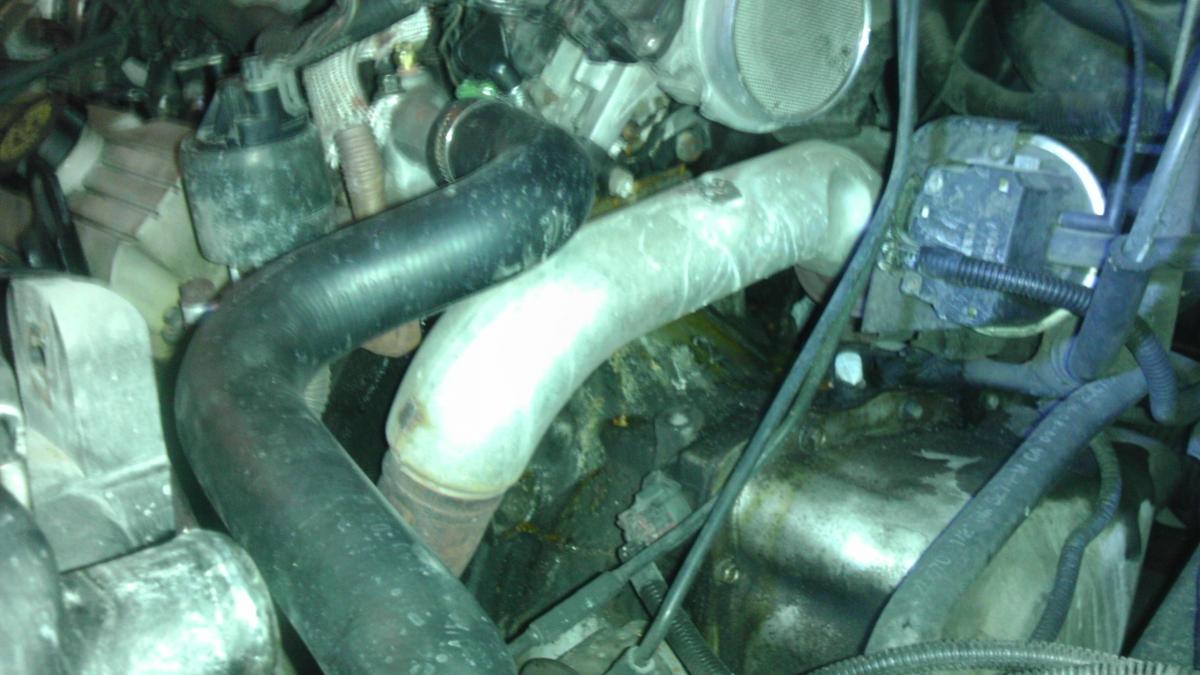
Next I tried to attack the heater hoses... my advice on this is, unless you know how to get to the heater of these hoses or it is absolutely necessary... just don't. My ends in the engine compartment were getting pretty beat up (I think I put a picture up earlier in this thread), but I was able to just cut the ends off and have plenty of hose left. You *MAY* be able to get these off the heat end with one of those cable hose clamp tools, but even then I'm not sure how you'd get it back on. I wasted a lot of time on this for no outcome. Here'* the after picture:

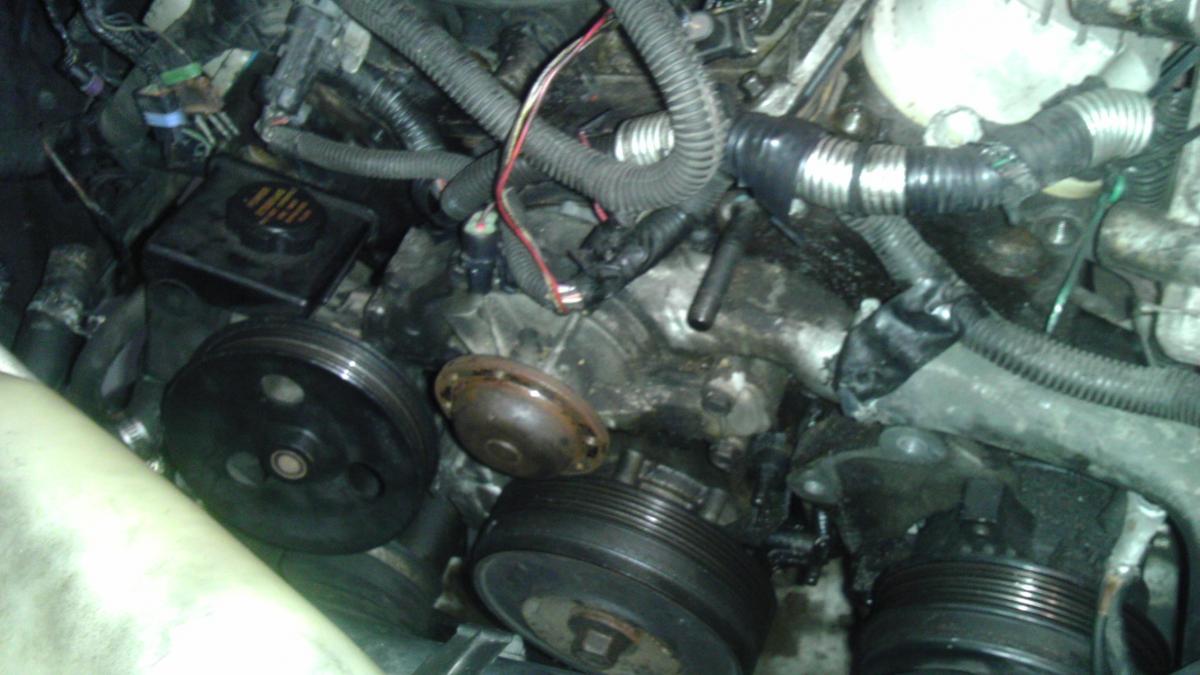
DOH! I have a beer for whoever can spot my rookie mistake before looking at the next picture.
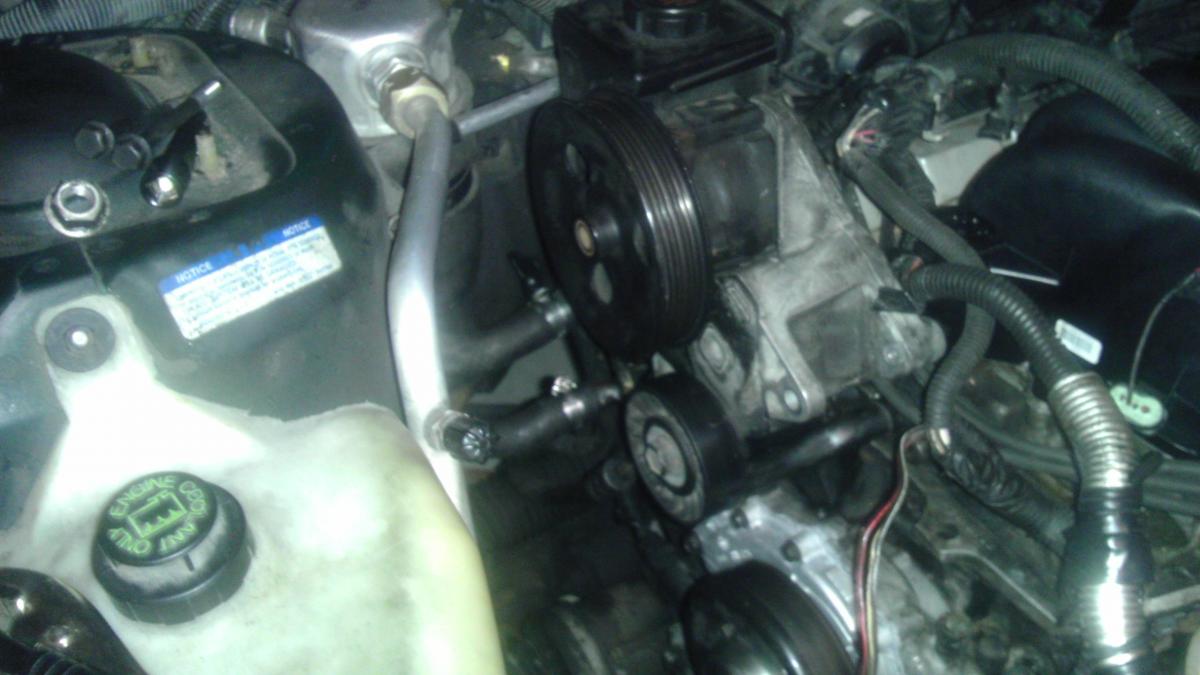
Power steering pump has to go back on first because of the lines!
Now finish reassembly and you're complete! Here'* a few things that I noticed also needed some help in the near future, can anyone confirm what these connectors are?
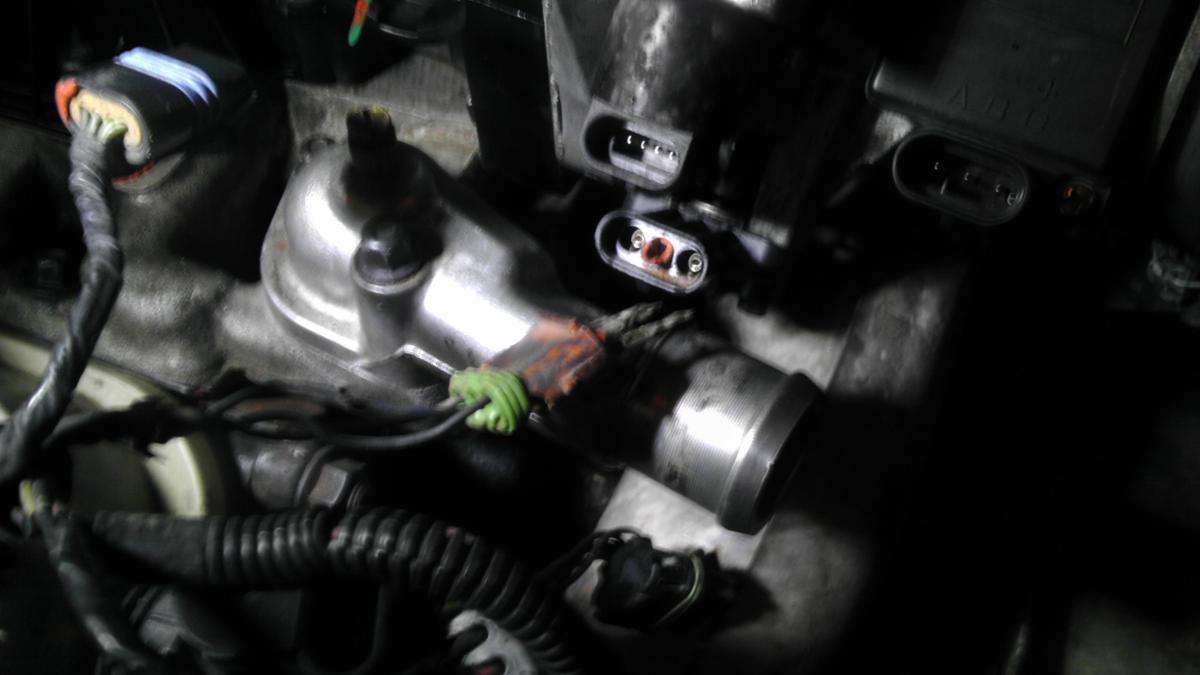
And also the connector shown in this picture on the center of the lower intake:
Need to replace both of these guys! Anyway, thanks for all of your help. Hopefully I can pass it along in the future.
My first recommendation is if you only have one weekend, don't try to do all three of these if you haven't done these before. I had done the LIM/UIM gaskets once before and I still barely got this done. The water pump and broken tools consumed a lot of time though. If you're doing the pump, don't forget to break the pulley bolts loose before removing the serpentine belt.
So the first thing I did was go at the radiator. This job is CAKE. Drain the fluid, take out the air box, remove hoses, remove upper fan bolts, and radiator cover bolts. The only tough part is the trans cooler lines. I used some liquid wrench on these the night before to make them a little easier to loosen because they can be a bit fragile. However, unless you take the fans all the way out, the bottom line is a knuckle buster and there'* no way around it. If you have a long wrench, you're going to want it. Once you've done all these steps, the radiator lifts right out. Ordinarily if you're just doing to the radiator you'd put it back in at this point, but I left mine out since the more room I had the better for upcoming items. It probably really didn't make a difference, but that was my thought process. Oh, take the battery all the way out of the car. Having that extra space will make getting the LR hose and the trans cooler lines much simpler. Here'* a picture of inside my old radiator. You can see some gunk was definitely building up. I also found this in my lower intake later.
From there I moved on to the UIM / LIM gasket job. One thing I made the mistake of this time around was I didn't have a backup O-ring for the coolant elbow. Just buy one and replace it. It'* much easier than fixing the leak afterwards trying to save a few dollars. This really isn't too bad of a job it just takes time. Initially I thought I had a slow leak. However, it turns out I didn't. Here'* a look at what I had coming out from below the throttle body:
From there read DanThurs' write up on it. It didn't line up perfectly with my model, but it was close enough. In my opinion, if there is something that doesn't need to come out but is in your way, take the thing out. Often times it only takes a couple of bolts to get it out and you will much appreciate the open space. It'* hard to see, but you can see some of the gunk similar to what was in the radiator here:
Take your time and get these surfaces nice and clean. Take it from someone who had to redo it two years later, it'* worth your time to do this right. This time around I found using a clean rag you can get 80% of the building from the old gaskets off. Then between brake cleaner, more rag, and a gasket scraper you can get it pretty good. I'm no expert, but I went until it felt smooth to the touch. Like I said, take your time and be careful not to scratch the surfaces. Note the rag I have covering the lifter valley, that'* an important precaution to keep debris from falling in.
Don't forget to clean the underside of the surface which will sit here upon reinstallation!
Same thing with the upper intake, get all areas where gaskets will sit very clean. This is mine before hand, forgot to take an aftershot but these cleaned up very nicely for me:
From this point I moved on to the water pump. This job is not easy. The passenger side engine mount and bracket must be removed in order to get the pump off. If you're going to attempt this job, make sure to have a quality socket and extension. I sheared my extension and ruined my socket and had to take a cab to Home Depot the next day. You don't want to be me. You'll want a quality 12-18" breaker bar too. I used the one that is meant to be for my hydraulic jack. You'll need to lift the engine from below to take some pressure off of the mount bolts. I used a 2x4 just a bit wider than the oil pan and a hydraulic jack. I was skeptical at first, but it worked no problem.
I took all of the accessories near the water pump out to free up the space (PS Pump, alternator, tensioner, ICM bracket). I was very glad I did. In fact, you might need to to get to some of these bolts.
First remove the through bolt on the torque axis engine mount. Spray lots of Liquid Wrench or your choice of penetrating oil and let it sit for a while. I did mine over 24 hours before I went at it and it was still a bear to get these bolts off. From there, I cracked the two top bolts of the torque axis engine mount loose, then went after the bottom two. To get to the bottom two, you may need to adjust the height of your engine relative to the frame (I think lift it up so the engine mount is sitting in the bracket). I was able to access these from above the car, one from each side of the bracket. I've read a lot of people go underneath though. My way worked fine. I did a lot of lowering/lifting the engine to get these four bolts free. I then had to lower the engine quite a bit in order to get this mount off. Next take the mount bracket to the engine off. These bolts aren't as bad, but still no fun. Get some oil on these as well. If you've made it this far, you're in the stretch. Here'* what I had:
Even if you've already drained your cooling system from doing something else, take my word for it, there is still a lot of coolant ready to come out of those bolt holes. Put your drain pan or whatever you're using under because as soon as that first bolt comes out a stream is going to be flowing for a minute or so. These bolts all come out pretty easy, but my pump was stuck to the block pretty well. A little playing with it and it came off though. Here is the result:
This surface was very difficult to clean. I'm not sure why, but something about the compound/gasket used on here was ultra tough. Leave a lot of time for this step. This is a critical part. Note my rag I put over the crankshaft position sensor. I had a lot of coolant dripping out from that area still and the last thing I wanted to be doing was ruining my sensor, so I highly recommend it as a precaution. Clean her up, put the new one one, use some water pump sealant and new gasket and you're off for the races. Reassemble in reverse order. Hand tighten pulley bolts. Don't forget to tighten to spec once the belt is back on!
Next I tried to attack the heater hoses... my advice on this is, unless you know how to get to the heater of these hoses or it is absolutely necessary... just don't. My ends in the engine compartment were getting pretty beat up (I think I put a picture up earlier in this thread), but I was able to just cut the ends off and have plenty of hose left. You *MAY* be able to get these off the heat end with one of those cable hose clamp tools, but even then I'm not sure how you'd get it back on. I wasted a lot of time on this for no outcome. Here'* the after picture:
DOH! I have a beer for whoever can spot my rookie mistake before looking at the next picture.
Power steering pump has to go back on first because of the lines!
Now finish reassembly and you're complete! Here'* a few things that I noticed also needed some help in the near future, can anyone confirm what these connectors are?
And also the connector shown in this picture on the center of the lower intake:
Need to replace both of these guys! Anyway, thanks for all of your help. Hopefully I can pass it along in the future.

Thread
Thread Starter
Forum
Replies
Last Post
DrJay
Performance, Brainstorming & Tuning
64
01-03-2005 07:51 PM